StoneGnome

Crochet Love · Crochet & Tunisian Crochet · Studying, Developing, and Teaching Crochet Techniques

  • Home/Blog
  • Crochet
    • Basic Skills
    • Beyond the Basics
    • Advanced Crochet
    • Stitches and Stitch Patterns
  • Tunisian Crochet
    • Basic Tunisian Skills
    • Beyond the Basics
    • Advanced Tunisian Skills
    • Stitches and Stitch Patterns
  • Tutorials n Guides
    • Guides
    • Step by Step Tutorials
    • Stitches and Stitch Patterns
  • Patterns
    • Free Patterns
    • Paid Patterns
  • Themes
    • Slip Stitches (ss)
    • Felting
    • Hats
    • Ribbing
    • Split Crochet Love
    • Top Stitch
    • Amigurumi
    • Small Hearts
    • Ornaments
    • Seasonal Themes n more
  • About
    • Contact Me
    • Copyright and Selling
    • Personal Data, Cookies and Marketing
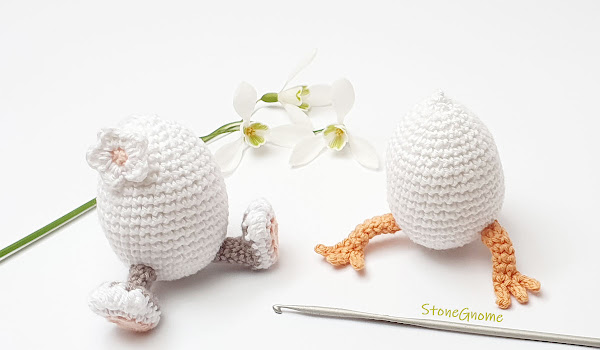
Bunny Egg usually hangs out around Easter enjoying the company of Junior Egg. 

Crochet Easter Bunny Egg and Junior Egg

Hence, the pattern for Bunny Egg has been updated and now includes Junior Egg. The two of them love that ♥ 

The 2-in-1 pattern is available at Ravelry, LoveCrafts or you can purchase it in the StoneGnome Payhip store. It's available in English and Danish.

If you want to try Junior Egg for FREE, then you'll find Junior right here.

Updated. This post has been updated as of March 2023

Skill level

The pattern is written for crocheters that are familiar with amigurumi. Difficulty level is intermediate/advanced. There are a few special stitches like BLO and Puff stitches. They are slightly modified, but - of course - explained.

Junior is the easiest one to make, while you might need a little peace, glasses and good light when you make the legs for Bunny Egg.

Size and Yarn

The Easter Egg will be around 6.5cm tall (2.6") if you work with the recommended hook size 2-2.5mm (US 0-B1 or steel 4, UK 14-13).

Use regular cotton yarn for amigurumi.

It could be something like Scheepjes Cotton 8 or similar.
Colors could be:
  • 502 white
  • 710 grey
  • 649 soft coral (or 715 nude).
  • 639 Burned Orange.
Bunny Egg and Junior Egg


I tried Scheepjes Organicon (Ravelry link), which was soft and lovely to work with. Even a bit thick and fluffy in the right way. Totally recommend this for a luxury project and if the egg is for decoration purposes only.

However, if you plan to use the Easter Egg as a toy, the yarn might get a little worn out faster than other yarn. At least that is what I experienced when I used it for samples and had to frog it several times.

More versions

Margie helped test and proofread the original patterns. Check out her latest colorful Junior Eggs from 2023 or her very, very cute Bunny Egg on Instagram. 

Thank you Margie for being such a patient and positive tester and proofreader.

Enjoy the pattern and Easter!

Related blog post: Junior Egg
Share
Tweet
Pin
No comments
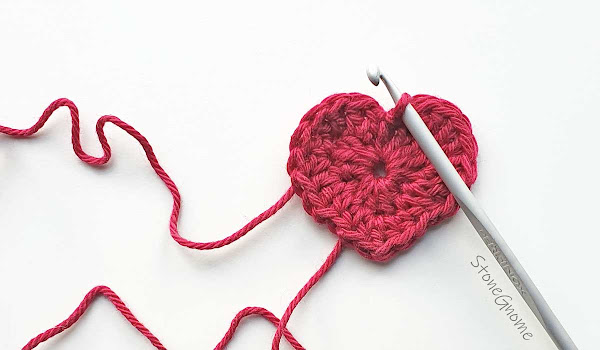
This heart was made for#WorldHeartDay (sep 2022), but it also works perfectly for Valentines Day.

World Heart Day - free crochet pattern

Use the heart to remind you of what is important in your life and what makes you happy. ❤ 

Written Pattern

Use any yarn and hook that works for you. I used Scheepjes Catona and hook 3.5 mm (US E/4- UK 9)

Abbreviations
(US terms)
ss    - slip stitch
ch    - chain
sc    - single crochet
hdc  - half double crochet
dc    - double crochet
[ ]    - all in the same stitch

Make a Magic Ring. Work 1st round in the Magic Ring.

Round 1 
Ch 1, 3 dc, 2 sc, 1 hdc, 1 dc, 1 hdc, 2sc, 3 dc, ch1 and 1 sc in the ring.
Pull the magic ring semi-tight.

Round 2 
sc in the chain, (2dc in the next st) x 4, 
1 hdc in the sc, 1 hdc in the hdc,
[1 hdc, 1 dc, 1 hdc] in the dc, 
1 hdc in the hdc, 1hdc in the sc, 
(2dc in the next st) x 4, 
1 sc in the chain, 1 ss in the sc.

Pull the magic ring as tight as possible (don't break the yarn). Cut the yarn and pull at the last loop on the hook till the strand is free. Pull tight and weave in ends.

Pattern Chart

If you prefer a chart, then see below. I will post these on Instagram too. 

Round 1 starts at the red dotted line. Round 2 starts at the blue dotted line.

❤ StoneGnome


If you want more hearts, then check out my other small heart posts. I love hearts ❤
Share
Tweet
Pin
2 comments
It’s cold and dark outside. So, have a happy hour with tea, a blanket, and a new little crochet project.
Striped Christmas Bauble Crochet Pattern
I've worked on Christmas bauble ornaments lately. The first pattern is now available below. Yeah!

Skills

The bauble is an intermediate/advanced project. If you are familiar with waistcoat stitches and slip stitches, the Christmas ball pattern is likely trouble-free and you can go straight to the yarn-hook suggestions and the pattern notes.

If the stitches - or the way they are used here - are fairly new to you, a little extra effort might be required to begin with. I promise you though, that getting to know the stitches better, is very well worth it.

Want more details about this way of working? Read: Tessa's Triangles - Hexagon Pattern

You should feel comfortable making uniform stitches of all kinds and it is also good to know how to adjust the tension of your work. - If not, read this one: How to Change and Control Your Tension

The Best Hook for Waistcoat Stitches

With waistcoat stitches, use a larger hook than usual for amigurumi and larger than the yarn label suggests.

A perfect hook has a head that is slightly smaller than the neck and is pointy or has a lip/nose that makes it easy to insert the hook between the legs of the previous stitch.

Read about wellformed waistcoat stitches here: Waistcoat Stitch and Stitch Patterns in Rounds.

Yarn-Hook Combos

I used:
  • Scheepjes Catona (Ravelry) 125m/50gr (138 yds/1.76oz)
  • hook size 4mm for the main parts plus a hook size 3mm for the final round (US G6 and D3, UK 8 and 11).
A Catona-bauble will then be almost 5cm (2") wide/tall.

Alternatively use regular cotton yarn for amigurumi with yardage 170m/50gr (186 yds/1.76oz) and hook size 3-3.5mm (US D3-E4, UK 10-9). For the final round use a slightly smaller hook for a nicer closing.


The Red Striped Bauble

The bauble is worked in rounds in a continuous spiral. (No joining with a slip stitch after each round).
Make not-tight stitches to make it easy to work with. Be thorough with the size of your chains. Adjust accordingly if needed, like when you change color.

Use the neck of the hook to determine the size of your stitches - and avoid tightening them after the loop leaves the hook. Otherwise, it might be difficult to make the following round.

Use 3-4 stitch markers or tiny stitch holders for the final round - And it's also nice to have a stitch marker or a long piece of yarn for marking the beginning of a round too.

Color changes are marked ‘-c’. Change color while pulling up the last loop of a stitch, so the new color is ready for the next stitch. For slip stitches, pick up the new color immediately.

Special stitches

Slip stitch decrease. Hook into the next two stitches in reverse order. Yarn-over and pull through all loops. For more info and a video, see Slip Stitch Tutorials - Part III.

Unfinished-ws. Insert the hook between the legs of a stitch, yarn-over and pull up a loop, yarn over and pull through one loop only. Keep the extra loop on the hook.

Abbreviations

ch = chain
sc = single crochet stitch
ws = waistcoat stitch
ws-c = Ws with a color change (see above)
slst/ slst-c = slip stitch / slip stitch with a color change
slst-blo = slip stitch in the Back Loop Only (blo)
slst-blo-dec = slip stitch decrease - in the back loop only
* * = Repeat instructions within * * all the way round
( ) x4 = Repeat instructions within the parentheses as many times as instructed.
[ ] = number of stitches in the round

Instructions

Start with red yarn.

Foundation
Make 6 loose sc in a Magic Ring. Pull the Magic Ring loosely together. [6]

1st Half of the Red Ball
  1. * With red. 1 ws and 1 ws-c in the next sc,
    ch-c 1 with the white (change color immediately). *
    Repeat all the way. [18]

  2. * With red. 1 ws in the ws,
    1 ws-c in the next stitch.
    With white; 1 slst-blo in the chain,
    1 slst-blo-c in the ws *.
    Start the next repeats in the CURRENT ws. Repeat all the way [24]
    (Keep changing color so all ws are done with red yarn and all slst are done in white.)

  3. * 1 ws in the current stitch,
    1 ws-c in the next stitch,
    1 slst-blo in each slst,
    1 slst-blo-c in the ws * [30]

  4. Repeat round 3. [36]

  5. Repeat round 3. [42]
Tighten the Magic Ring and weave in the yarn end from the beginning of the work. - Or just tuck the loose end inside the bauble with or without a knot. (I didn't make a knot, mine are fine as they are just for decoration).

Start filling the bauble. Depending on your tension, yarn, and more, the white part might arch inward. Use this if you like - or fill the bauble firmly in the end, if you want a very round ball.

2nd Half of the Red Ball
  1. Begin this round in the ‘current ws’ and make the repeats from the ‘next ws’.
    * 1 ws in the ws,
    1 ws-c in the next ws,
    1 slst-blo in the next 4 slst,
    1 slst-blo-c in the last slst * [42]

  2. Repeat the previous round.

  3. * 1 ws in the ws,
    1 ws-c in the next ws,
    1 slst-blo-dec,
    1 slst-blo in the next 2 slst,
    1 slst-blo-c in the last slst * [36]

  4. * 1 ws in the ws,
    1 ws-c in the next ws,
    1 slst-blo-dec,
    1 slst-blo in the next slst,
    1 slst-blo-c in the last slst * [30]

  5. * 1 ws in the ws,
    1 ws-c in the next ws,
    1 slst-blo-dec,
    1 slst-blo-c * [24]

  6. * 1 ws in the ws,
    1 ws-c in the next ws,
    1 slst-blo-dec-c in the slst. * [18]

  7. * 1 ws in each ws * (Skip all slst). [12]
Final Round
Change to a hook 1 size smaller.

Make 1 ws in the first stitch and unfinished-ws the rest of the way. Every time you have 4 loops (max) on the hook, move 3 loops to a stitch marker /stitch holder (or just a piece of string). The loop you made last, keep that on the hook.

Last round of the Christmas Ball

Cut a long yarn end. Pull the yarn end through all the loops on the hook and then all the loops on the stitch markers. Use a needle or a hook.

Insert a needle

Fill the bauble - firmly for a round ball.
Tighten the yarn end and use a needle to secure it by going around in the last loops once more.

Closing the Christmas Ball

Insert the needle into the ball and let it come out from the middle of the 'star'.
Shape the Christmas bauble by hand if needed.

Have a Merry Crochet Christmas!


...Psst!
If you liked this, then try other projects using waistcoat stitches and slip stitches. You can find them under the theme Split Crochet.

The stitches are not used much with traditional patterns but are really fun to work with.
Share
Tweet
Pin
No comments
It's time for Christmas Crocheting.
Christmas Ornament Patterns

Here are links to some free Christmas crochet patterns to you from StoneGnome.

Little ornaments are great to crochet and hang in the window or on a Christmas tree. They are also pretty fast to make, which is excellent if you have busy days or just need something easy to make.

I love the crochet snowflakes. They are small, bright, and last all winter as window decorations. And btw, there are two different versions. The second snowflake might have been hiding, so use the link below :)

I also love hearts; you can use them for more yearly occasions. And then of course the pretty stars. Very easy and relaxing to make.
  • World Heart Day
  • Snowflake #1
  • Snowflake #2
  • A Little Christmas Heart
  • Sibling Stars
  • Double Heart

Christmas Crochet Ideas

If you get into it and suddenly have a lot of crochet beauties, then use the crocheted items as part of your Christmas wrapping for a more personalized look and feel on the presents. Or make a tree branch mobile by hanging ornaments on a pretty curly branch from the garden.

Happy Christmas Crocheting!
Share
Tweet
Pin
No comments

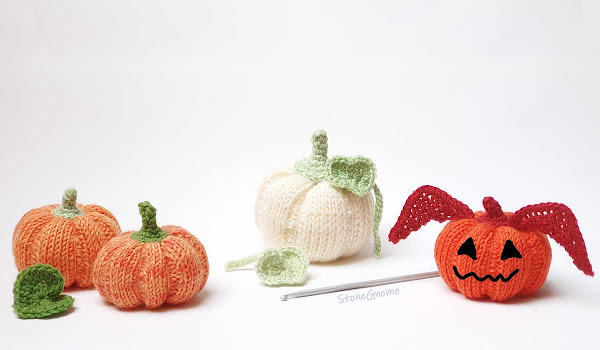
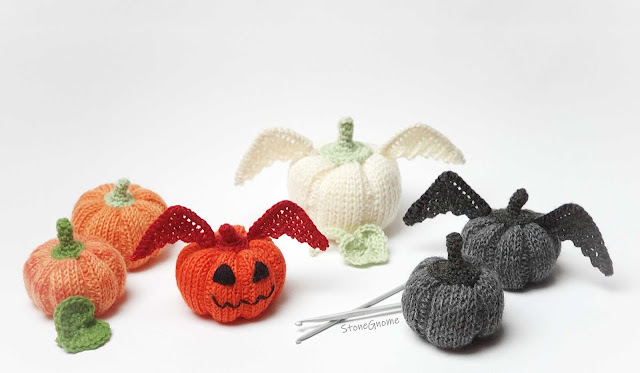
The Tunisian Pumpkin pattern has been through a little update.

Halloween crochet pumpkins

The pattern is updated with wings, a leaf, and two pumpkin variations. It adds a lot of possibilities for happy or scary or stylish Halloween decorations.

Get the pattern here

Read more and purchase the pattern on Ravelry, LoveCrochet, or the StoneGnome Store.

Or purchase the pattern right away here: Buy Now

Skills Needed

The pattern is a mix of regular and Tunisian crochet. If you don't know Tunisian crochet, don't worry. You will only need to learn a couple of basic Tunisian crochet stitches to make this, and it can be made with a regular crochet hook (with no handle).

All the minor details are basic regular crochet - with a little exception. To be able to make the wings mirrored, a few unusual stitches are added. They are not very difficult to do.

I've borrowed the technique from Tunisian crochet where they are called 'reverse stitches'. However, it is not the kind of reverse stitches we normally relate to, when we do regular crochet.

See a video and a little note about the reverse stitches here.

Happy Halloween!

Share
Tweet
Pin
No comments
Crochet your own decorated eggs. Use a basic egg and change colors as you wish for nicely decorated eggs.

crochet Easter eggs

If you use waistcoat stitches for your egg you get different options. Like small, heart-shaped dots ♥ 

Share
Tweet
Pin
No comments
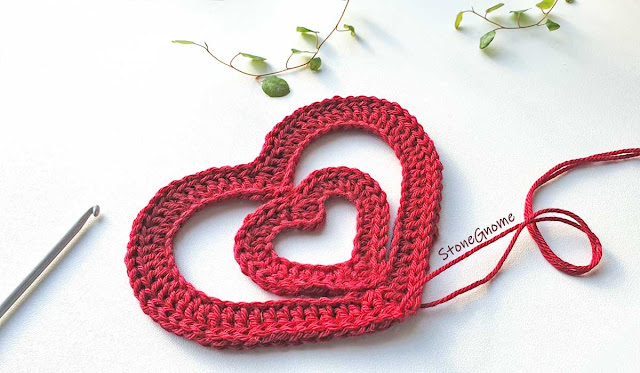
This adorable double heart is double love. Give it to someone extra special or make it for your own joy.

Double Heart - Crochet Pattern

The heart ornament is made in one piece, so there is no sewing the parts together in the end.

Share
Tweet
Pin
No comments

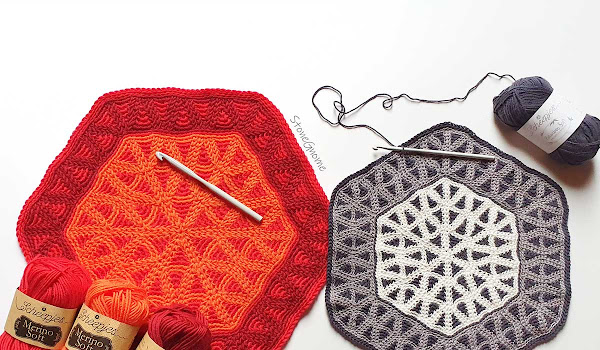
The innovative new crochet pattern has just been released. Tricky Triangles is a mandala presenting a new way to crochet in the round.

Tricky Triangles Mandala Crochet Pattern

The mandala will be soft and drapey and excellent for making a pillow or you can make it a decorative table topper. There are a lot of other possibilities for hexagons if you google it.

The Mandala

I'm not sure if the level of it is beyond basics or advanced. It might more be a matter of preferences and whether you can find a hook that works for you.

It's colorwork and it requires you to make somewhat uniform stitches. The main stitches are slip stitches and waistcoat stitches. If you are not sure whether these stitches suit you or not, try the FREE introduction pattern Tessa's Triangles first.

Read more: Slip Stitch Tutorials.
Read more: Waistcoat stitches and Stitch Patterns in Rounds

Tricky Triangles comes with a 30% introductory discount. The discount is only available on Payhip or Ravelry and runs out in 2 weeks (Nov. 18th Copenhagen time). Use the coupon code TRICK to get the discount.

The mandala pattern is available in English (US terms) and Danish. 

Get the pattern at Ravelry, at LoveCrafts, or right here via my new Payhip Store.

Tricky Triangles

Yarn, Hook sizes, and Final Sizes

In theory, you can use any three yarn balls and a relatively large hook. Preferably a hook with a relatively small head. For the best result, the yarn should be uniform and soft, with a smooth look.

The yarn I have used is very soft and likable, so I can certainly recommend it.


Peppermint and Licorice
Hook size 5mm (H-8). It gets around 30cm (11.8") wide.
Crochet Mandala. Peppermint and Licorice Scheepjes Organicon/Bamboo Soft.
Organicon - 220 Broken Almond
Bamboo Soft – 263 Smokey Diamond (dark)
Bamboo Soft – 264 Antique Silver (grey)
(Big) Red.
Hook size 8mm (L-11). The red is approximately 37cm (14.5") wide.
Crochet Mandala. (Big) RedScheepjes Merino Soft.
645 Van Eyck (orange)
621 Picasso (red)
623 Rothko (dark red)

Yarn Packages

Littlebugz.dk made yarn packages for both versions. It might be of most relevance if you live in Denmark, Sweden, and Norway - or close. She is good at adding discounts on yarn packages for my patterns.

Have a look at the yarn packages at Littlebugz.

FYI. A lot of the yarn I use is sponsored by Littlebugz.dk. Littlebugz then makes yarn packages for my patterns. And in case you wonder. Littlebugz doesn't sponsor my opinion or anything other than the yarn 😊

Thank You

Thank you to all that have helped me out. Janelle did a great job before it was even a pattern. She helped me with terms and the structure of the written pattern. Then Anita Reinehr came in early to do a superb tech edit. Unusual yes, but with a new thing, it felt important to do a tech edit before having the pattern tested. 

Finally, a lot of people did testing. Some just partly, some only on the early Tessa's Triangles. Thank you to all of you too; Pamela Tan, Robyn Kaltea, Ruth Lister, Jess Wells, and more.

Share
Tweet
Pin
No comments
Here is a nice little FREE spider web pattern.
Spider Web Crochet Pattern

Use it for a coaster or make more rounds and use it as a table topper. Once you get the pattern it is very simple and you decide how big you want it.

Yarn and Hook Suggestions

You can make it of any yarn you want and then a relatively large hook. Btw, I recommend a dark but NOT BLACK yarn, to begin with. It is VERY difficult to find the right places to insert the hook, when using black yarn and working with waistcoat stitches.

I’ve tried two combos that worked well for me:
Mixed Fingering Yarn (Semi-light)
  • Wool yarn blend (orange) and cotton yarn (black). Both with yardage around 210m/50gr (230yds/1.76oz)
  • Hook size 4 mm (US G-6)
Cotton Yarn - Fingering
  • Cotton yarn for amigurumi with yardage around 170m/50gr (186yds/1.76oz)
  • Hook size 5 mm (US H-8)
If you are making a coaster meant for warm chocolate, tea, or coffee, you should use pure cotton yarn.

Instructions

The spider web pattern is based upon Tessa’s Triangles (a hexagon pattern). You can find tips and secrets in Tessa’s Triangles that can be useful for the spider web as well.

Abbreviations
sc = single crochet stitch
ss = slip stitch
ws = waistcoat stitch
-blo = back loop only
** = repeat all the way around

A waistcoat stitch is a single crochet stitch, where you insert the hook between the legs of the previous stitch.

Start with the web color (dark).

Foundation
6 loose sc in a magic ring. Add a stitch marker between the legs of each stitch if it helps you.
Join the round with an ss-blo in the first sc.
Note. This is a tricky part as the first sc can be pulled at so much, that you can’t find where to insert the hook when doing the ws. This is why I recommend attaching stitch markers right after making the magic ring.

Round 1)
*ws in the current sc (change color to orange while pulling up the last loop of the ws),
ss-blo in the next sc while changing color again *
Note. Work the final ss-blo into the first ws of the round.

Round 2)
*ws in the current ws (change color to orange while pulling up the last loop of the ws),
ss-blo in every ss,
ss-blo in the next ws while changing color *

Round 3-4)
Repeat round 2

Round 5-6)
Repeat round 2, but without the color changes.

More Rounds
Work round 2-6 as many times as you want.
Crochet mini spider web

Final Two Rounds

Round 7)
Repeat round 2

Round 8)
ws in the current ws (change color to orange while pulling up the last loop of the ws),
* ss-blo in every ss,
ss-blo in the next ws while changing color,
2 ws in the current ws (change color to orange while pulling up the last loop of the second ws) *

Note. Work 2 ws in the first stitch of the round too, but skip the color change.

Finish Off
Cut the yarn.
Expand the last loop till the yarn end is through.
Weave in the ends.

Happy Halloween!
Share
Tweet
Pin
No comments

Amigurumi and Tunisian Crochet arent’ something you very often think about as related. However, Tunisian crochet can be a very good choice for making nice and soft amigurumi.

Tunisian crochet Pumpkin

I missed working with Tunisian crochet stitches. Then I got inspired by our creative kids (age 6 and 8) to make a pumpkin.

UPDATE. This pattern has been updated with extra items and features. Read more here.

The body of the pumpkin is made of Tunisian crochet stitches. The stem and the blossom end are regular crochet.
Tunisian crochet Amigurumi

Yarn.
I recommend the wool yarn blend Scheepjes Metropolis. It’s very very nice to work with and supports the softness of the Tunisian crochet stitches that makes the pumpkin nice to hold.

Size. The pumpkin will be around 7cm tall and wide (2.8”) with the suggested yarn here.

Currently, you can purchase the Pumpkin Pattern at Ravelry and at LoveCrafts.
- OR -
Find the pumpkin at my payhip store and get it for FREE when you use the coupon code PUMPKIN
(The coupon code expires November 1st 2021.)

Happy Halloween!


Share
Tweet
Pin
No comments

A cute little hexagon made with unusual stitches.

Tessa’s Triangles - Hexagon crochet pattern

Make one little hexagon and you have a coaster. Make more hexagons and you can make a bag and with a little patience maybe even a blanket.

Introducing New Techniques

Tessa’s Triangles hexagon pattern is an introductory pattern. Learning how to work these stitches is the key to more advanced patterns. Another pattern is coming up soon at StoneGnome.com. You might also get ideas for making some on your own after making the hexagon. 

Tessa’s Triangles is a free pattern and is available in English and Danish.

Get the Pattern

Get the pattern now in StoneGnome’s new Payhip store*, on LoveCrochet, or add it to your library at Ravelry.

*Payhip will ask for your email, but that is only to make sure you get access to the pattern.

Pattern update: The hook conversion in the written pattern should be hook size 5mm = US H-8, as stated in the video tutorial. 
If you are happy with using US I-9, then please keep using that.

Want the Newsletter? Find the orange button on this site and sign up for the newsletter.


Tricky Parts

There ARE tricky parts in Tessa’s Triangles. Finding the right spot to insert the hook, when making waistcoat stitches in a round is probably new to pretty much all crocheters. It took me a while to figure out too.

Round 1 is tricky. So much is going on at the same time. Work slowly and take your time. 

Tip. Omit the color change in your first sample and make chains instead of slip stitches, if it helps you. Then you can concentrate on the waistcoat stitches.

I have another workaround for the first round in mind, but it will not give you the nice star in the middle, but it can get you started. The workaround will be available soon.  

Follow me @Instagram. I might show these little workarounds there if it helps you.

Visual Learner?

To support the written pattern, a video is available. Some parts might be easier to do if you see how I do it.

Direct link to the video https://youtu.be/_uiaJC1xGgQ

Share

Share your hexagons. Tag me on instagram (with @stonegnomedesign) or facebook (with @stonegnome), so I can see how far you get. Feel free to also tag me, if you run into trouble. Then I’ll do my best to help you out. <3 

Have fun with this.

Tricky Triangles Teaser
Share
Tweet
Pin
No comments
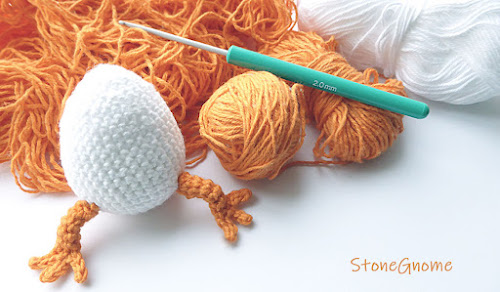
If you haven't met the cute Junior Egg already, let me introduce you now. He/she likes to sit in a nest of yarn - or hang from a twig or a tree. And the Junior Egg pattern is free!
Crochet Easter Egg - Junior
Years ago, right before Easter, the kids and I played with paper and cardboard and we came up with an egg with legs because it was pretty easy to draw and cut out and glue.

We loved it! We thought the result was eggcellent. An egg with a lot of personality. So I thought. Why not make a crochet version? 

Materials

  • Hook size 2-2.5mm (US 0-B1, UK 14-13)
  • Scissors
  • A long piece of scrap yarn to use a stitch marker
  • Filling
Yarn
Cotton yarn with yardage around 170m/50gr (186y/1.76oz)
A tiny bit of white and orange.

Spiral Note
The egg and leg are worked in a spiral. Working in a spiral means working in continuous rounds without ending each round with a slip stitch. Put your scrap yarn stitch marker in place, when a round is done, and continue with the next round immediately. The yarn stitch marker show what round you are working on.

Abbreviations (US terms)
  • ch = chain
  • sc = single crochet
  • inc = increase. Make two sc in the same stitch.
  • dec = decrease. Work 2 sc together. 

  • () = repeat instructions between parentheses as many times as directed – OR throughout the round/row.
  • [] = the number of stitches in a round or row.

Junior Egg Pattern

Work in a spiral.
  1. Begin with 5sc in a magic ring. Pull tight. [5]
Increase with 5 stitches in each round like this:
  1. 1 inc in each stitch all the way. [10]
  2. (inc, 1 sc) 5 times. [15]
  3. (sc, inc, sc) 5 times. [20]
  4. (inc, 3 sc) 5 times. [25]
  5. (2 sc, inc, 2 sc) 5 times. [30]
  6. (inc, 5 sc) 5 times. [35]
Round 8-15. (8 rounds in total). Work straight up now – no increases. 1 sc in each stitch. [35]

For shaping the top of the egg, I recommend invisible decreases*: Insert the hook into the front loops of the next 2 stitches right after each other (do not yarn-over in between). Yarn-over and pull through two loops. Yarn-over and pull through the last loop.
*Don't make invisible decreases if you plan to turn the backside out like I sometimes to do.

  1. 1 sc, (dec, 15 sc) 2 times. [33]
  2. (9 sc, dec) 3 times. [30]
  3. (4 sc, dec, 4 sc) 3 times. [27]
  4. (7 sc, dec) 3 times. [24]
  5. (3 sc, dec, 3 sc) 3 times. [21]
Add fill. Add more fill after the next couple of rounds.
  1. (5 sc, dec) 3 times. [18]
  2. (2 sc, dec, 2 sc) 3 times. [15]
  3. (1 sc, dec) 5 times. [10]
Remove your marker. The closing off is not worked in full rounds.

Closing Off the Egg
Cut a long yarn end. Expand the loop on the hook and pull until the yarn end is out and the work secured.

Attach a needle to the yarn end. Insert the needle into the front loop of every stitch all the way around (9 stitches). Pull tight and the hole closes.

Only if needed, secure the yarn again, by weaving it in and out a couple of times.
Use the yarn end for hanging the egg on a twig.

Related blog post: The Easter Bunny Egg pattern


Bunny Egg and Junior Egg
Bunny Egg & Junior Egg

Leg

Work in a spiral.

Foundation option #1: Ch 5. Slip stitch it into a ring. [5]
Foundation option #2: Magic Ring with 5 sc. [5]

1-6) Sc all the way for 6 rounds.
 
7) Toe: Ch 4.
 
8) Use the back bumps of the chains. Skip the first and slip stitch into the next three.
9) Slip stitch into the middle of the foot through front and backside.
10) - 11) Repeat line 7-8.
12) Slip stitch into the left side of the foot.
13) - 14) Repeat line 7-8.
15) Slip stitch into the side of the foot again.

Finishing Off
Cut a long yarn end and pull the yarn end through the slip stitch.

Pull the yarn through the leg, so both yarn ends are at the top of the leg. (Find the nearest ’hole’ to pull it through. Use a needle or your hook).

Make another leg.

Sew the legs on the egg. Place them somewhat on the same side. ’Fold’ the legs, with the toes pointing forward and the ’knees’ slightly bend.

Free crochet pattern - Junior Egg

Thank you to Sofiia Norah Rasmussen for helping me test this with short, short notice.

If you want ideas of how to make a colored version, then check what Margie did on Instagram and give her a little love.

Enjoy!


Note. The original blog post is from March 2017. The latest update is of March 2021.

Share and Selling Note
You are welcome to share or sell any products you make from my patterns. :)
Read more about copyright and selling here.
Share
Tweet
Pin
2 comments
Let us end the year by being kind to ourselves and each other. I have a FREE little heart-shaped crochet love for you. 
Crochet a little heart with a crocheted string
Hang it on the Christmas tree, as decor for a present or just make one if you need a break during the holidays. 

Share
Tweet
Pin
No comments
To all the little stars in the world. Crochet a little star or two. 
Crocheted Stars

In a few weeks, it is December 1st. I'm not good at being ahead of the season, but this year my sweet kids started making little ornaments a while ago, so I joined them. 

Making the star pattern was a bit frustrating at first. :) Sometimes making things very simple is difficult. I also wanted it to somehow match the Valentine's heart, which can be used as a Christmas decoration as well.
Read more: See more hearts at Stonegnome

I think they will look good together in a window or at the Christmas tree.

Crocheted star and heart

Below is the crocheted star pattern. Have fun ❤️

Star Pattern

While working on the pattern it can be difficult to see the star shape. The further you get, the better it should be, and once blocked and shaped, it should be just how you want it.

Little star: around 5cm wide (2")
Medium star: around 6cm wide (2.4").

  • hook size 2.25-2.5mm (US: B/1, UK 13)
  • cotton yarn. Yardage around 170m/50g (185y/1.76oz)
  • optional. A stitch marker.
  • glasses, if needed.
Abbreviations (US terms)
ss = slip stitch
ch = chain
hdc = half double crochet
dc = double crochet
tr = treble crochet
yo = yarn over
[ ] = instructions for the medium star

Foundation
Chain 30 [medium star, chain 40]. Join with a ss to make a ring.
Optional. Turn the work, so you can see the back bumps of your chains. Hook into the back bumps.

1) chain 3
2) 1 dc and 1 hdc in the base of the 3 chains
3) 1 hdc in the next chain [medium star, repeat the line]

Now make a cluster-decrease of two hdc with a skipped chain between. like this:

4) yo, insert the hook into the next chain and pull up a loop
5) skip a chain
6) yo, insert the hook into the next chain and pull up a loop
7) yo and pull through all 5 loops on the hook

Continue with:

8) 1 hdc in the next chain [medium star, repeat the line]

Star point
Tip: when working a lot of stitches into a single chain, the chain right AFTER might get very tight. Avoid it being tight by inserting a stitch marker into it before you start the previous group of stitches.

9) (optional. Place a stitch marker in the second chain from the hook)
    Make 5 stitches in the next chain (= the first chain from the hook): 1 hdc, 1 dc, 1 tr, 1dc, 1hdc

Continue with:

10) (optional. Remove the stitch marker)
      1 hdc in the next chain [medium star, repeat the line]

Repeat from line 4 until you reach the last star point, which is already halfway done.
(The initial 3 chains you made in the beginning, are substituting the tr.)

11) In the base of the 3 chains make two more stitches: 1hdc, 1dc

Join with a ss, cut the yarn, and secure it by pulling it through the last loop on the hook. Sew in the yarn end from your foundation chain. Make it come out at the top of the star. Use the two yarn ends for hanging up the ornament.

Wash and block* it for a perfect shape and you've got a star!

Let me know if you find any typos in the pattern. ❤️


*Wash and block
I highly recommend blocking for the best final touch.

Handwash the star. Press out excess water by wrapping it in a towel. Place the star on a flat surface and pull the outer and inner star points till you are happy with the shape. Use water-safe needles and a foamboard or likewise if you prefer - I just do it freehand.

The star points can be pointed or more rounded. Let the star dry.

Make a Whole Family of Stars

You might have figured out by now how to make an even bigger star. Every time you add 10 more chains to the foundation row you go up one size. And the line with 1 hdc is also repeated once more (lines 3, 8, 10).

I tried and ended up with 4 different sizes of stars. After blocking and a little nursing, even the bigger one got very good.

Crocheted star family

I'm not sure how far you can go and keep the shape, but feel free to try :) Just be aware that the larger the star, the more wobbly it will be and you might need to use stiffener if it is to be hung up.

Tag me on Instagram @stonegnomedesign to show me your star(s).


Enjoy!


Sell & Share
You are welcome to sell/share any products you make from my patterns. For further information look at Copyright and Selling

Snowflakes

If you like crocheted Christmas ornaments, try the two snowflakes too - Snowflake 1 and Snowflake 2
Crocheted snowflakes
Share
Tweet
Pin
No comments
Evie's FREE ear warmer pattern is ready.
Crochet a Flexible Ear Warmer
It doesn't take much yarn to make. Find the pattern at Ravelry or LoveCrafts now.

Share
Tweet
Pin
No comments
Wet, cold, hot, sunny, cold, warm. When the weather is indecisive like this, we better be prepared. Here is a UNIQUE 3-piece pattern with hat, cowl, and fingerless gloves.

3 pieces. A UNIQUE set. Hat, cowl, fingerless gloves.

Did you try the free Evie's - Fingerless Gloves pattern yet? If not, it is still available for free. Try thee gloves and you might want the full set.

Share
Tweet
Pin
No comments
Older Posts

Newsletter

Don't miss the next tip or pattern
from StoneGnome.

Find StoneGnome at

  • Ravelry
  • LoveCrafts
  • Littlebugz

  • Facebook
  • YouTube
  • Pinterest
  • Instagram

Popular Posts

  • Tunisian Crochet Cast On
  • Free Snowflake Pattern
  • Tunisian Single Hook Cast On
  • A Valentines Heart for You
  • Avoid an Ugly Slip Knot

Labels

advanced amigurumi basic beads Bornholm christmas crochet crochetChart easter edge felting filetcrochet freePattern guide hat miteredCorner ornament paidPattern pattern ribbing shoes slipStitch spiral Split Crochet stitchPattern topStitch tunisian tutorial

recent posts

My favorite Links

  • My designs at LoveCrafts
  • My designs at Ravelry
  • My design page at Littlebugz.dk
  • Annie's Catalog
  • Designing Vashti
  • Crochet Kim
  • Free Vintage Crochet
  • Stitch Fiddle
  • Stitchboard · Pattern Wizard
FOLLOW STONEGNOME @INSTAGRAM

    Powered by Juicer.io

Ⓒ StoneGnome · Created with · by BeautyTemplates