It’s cold and dark outside. So, have a happy hour with tea, a blanket, and a new little crochet project.
I've worked on different Christmas bauble ornaments, or Xmas balls the last few years. The first pattern is available below. Yeah!
Skills
The bauble is an intermediate/advanced project. If you are familiar with waistcoat stitches and slip stitches, the Christmas ball pattern is likely trouble-free and you can go straight to the yarn-hook suggestions and the pattern notes.
If the stitches - or this way of using them - are fairly new to you, a little extra effort might be required at first. I promise you, getting to know the stitches better is very well worth it.
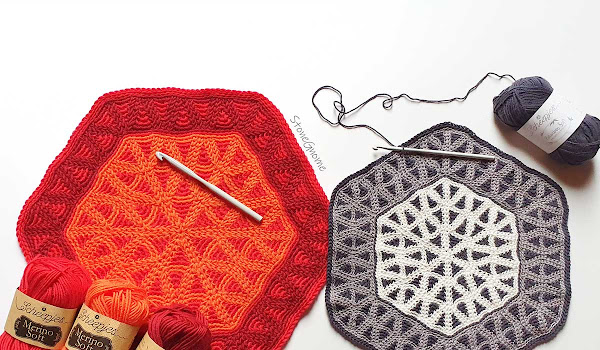
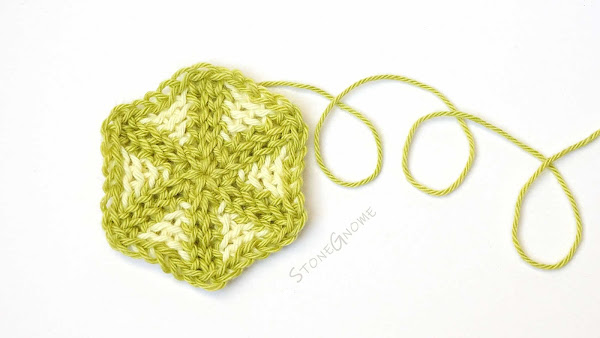
Want more details about this way of working? Read: Tessa's Triangles - Hexagon Pattern
You should feel comfortable making uniform stitches of all kinds and it is also good to know how to adjust the tension of your work. - If not, read this one: How to Change and Control Your Tension
A Note about your Hook
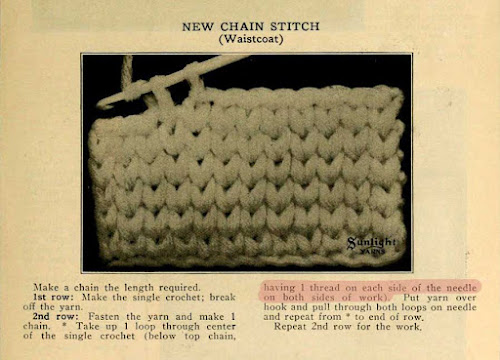
A perfect hook for waistcoat stitches has a head that is slightly smaller than the neck and is pointy or has a lip/nose that makes it easy to insert the hook between the legs of the previous stitch.
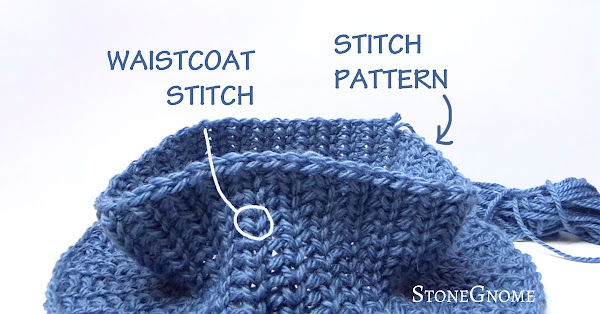
Remember. We should always use the neck of the hook to determine the size of our stitches - and avoid tightening them after the loop leaves the hook. With waistcoat stitches, it is even more important or it will be difficult to make the following round.
Read about wellformed waistcoat stitches here: Waistcoat Stitch and Stitch Patterns in Rounds.
Yarn-Hook & Size
The bauble should be rather small to keep it light. A Catona-yarn-bauble like mine will be around 5cm (2") wide/tall.
I used:
- Scheepjes Catona (Ravelry) 125m/50gr (138 yds/1.76oz)
- hook size 4mm for the main parts and 3mm for the final round (US G6 and D3, UK 8 and 11).
However, any cotton yarn doable for amigurumi should work with this pattern. It could be cotton yarn with yardage 170m/50gr (186 yds/1.76oz) and hook size 3-3.5mm (US D3-E4, UK 10-9). For the final round use a slightly smaller hook for a nicer closing.
The Striped Bauble Pattern
The bauble is worked in rounds in a continuous spiral. (No joining with a slip stitch after each round).
Make not-tight stitches to make it easy to work with. Be thorough with the size of your chains. Adjust accordingly if needed, like when you change color.
Use a stitch marker or a long piece of yarn to mark the beginning of a round.
Use 3-4 stitch markers or tiny stitch holders for the final round.
Special Stitches
Slip stitch BLO decrease (slst-blo-dec). Hook into back loops only (blo). Hook into the next two stitches in reverse order. Yarn-over and pull through all loops. For more info and a video, see Slip Stitch Tutorials - Part III.
Unfinished-ws. Insert the hook between the legs of a stitch, yarn-over and pull up a loop, yarn over, and pull through one loop only. Keep the extra loop on the hook.
Waistcoat stitch decreases (cap version only). Insert the hook between the legs of the next stitch, yarn-over and pull up a loop, do the same for the next stitch so you have 3 loops on the hook, yarn-over and pull through all loops on the hook.
Abbreviations
ch = chain
sc = single crochet stitch
ws = waistcoat stitch
ws-c = Ws with a color change (see below)
slst-blo = slip stitch in the Back Loop Only (blo)
sc = single crochet stitch
ws = waistcoat stitch
ws-c = Ws with a color change (see below)
slst-blo = slip stitch in the Back Loop Only (blo)
slst-blo-c = slip stitch BLO with a color change
slst-blo-dec = slip stitch decrease - in the back loop only
* * = Repeat instructions within * * all the way round
( ) = Repeat instructions within the parentheses as many times as instructed.
[ ] = number of stitches in the round
slst-blo-dec = slip stitch decrease - in the back loop only
* * = Repeat instructions within * * all the way round
( ) = Repeat instructions within the parentheses as many times as instructed.
[ ] = number of stitches in the round
Color changes are marked ‘-c’. Change color while pulling up the last loop of a stitch, so the new color is ready for the next stitch. For slip stitches, pick up the new color immediately.
Instructions
Foundation
With red yarn. Make 6 loose sc in a Magic Ring. Pull the Magic Ring loosely together. [6]
1st Half of the Red Ball
- *1 ws in the first sc,1 ws-c in the same/current sc,
ch-c 1 (change color to red immediately). *
Repeat from * to * all the way. [18] - Keep changing color so all ws appear red and all slst appear white.
* With red. 1 ws in the ws,
1 ws-c in the next stitch.
With white; 1 slst-blo in the chain,
1 slst-blo-c in the ws *.
Repeat all the way. Start the repeats in the CURRENT ws. [24] - This round you will have 3 white slst between the ws.
* 1 ws in the current stitch,
1 ws-c in the next stitch,
1 slst-blo in each slst,
1 slst-blo-c in the ws * [30]
- Repeat round 3. This round you will have 4 white slst. [36]
- Repeat round 3. This round you will have 5 white slst. [42]
2nd Half of the Red Ball
- Begin this round in the ‘current ws’ and make the repeats from the ‘next ws’.
* 1 ws in the ws,
1 ws-c in the next ws,
1 slst-blo in the next 4 slst,
1 slst-blo-c in the last slst * [42] - Repeat the previous round. [42]
Prepare to fill the bauble. Depending on your tension, yarn, and more, the white part might arch inward. Use it if you like, or fill the bauble firmly in the end, if you want a very round ball.
Create a loop for hanging the ornament
Attach a needle to the yarn end. Insert the needle into the next stitch and out in the middle of the cap.
While leaving most of the golden yarn to form a large loop, bring the needle back into the cap's center, and out at the bottom of the cap, then reinserting it right next to the initial point.
Tie a knot using the large loop and the short loose yarn end. Tuck the knot and the yarn end into the cap to hide it.
- * 1 ws in the ws,
1 ws-c in the next ws,
1 slst-blo-dec,
1 slst-blo in the next 2 slst,
1 slst-blo-c in the last slst * [36] - * 1 ws in the ws,
1 ws-c in the next ws,
1 slst-blo-dec,
1 slst-blo in the next slst,
1 slst-blo-c in the last slst * [30] - * 1 ws in the ws,
1 ws-c in the next ws,
1 slst-blo-dec,
1 slst-blo-c * [24] - * 1 ws in the ws,
1 ws-c in the next ws,
1 slst-blo-dec-c in the slst. * [18] - * 1 ws in each ws * (Skip all slst). [12]
If you don't want a cap, head directly to the Final Round (No Cap). Otherwise, prepare for the cap. Use the colored yarn.
- Make waistcoat stitch decreases all the way [6]
slst and cut the colored yarn, Pull the yarn end through the loop. Secure ends. A little knot using the white and colored yarn should be fine. Tug the loose ends into the bauble. Gaps between the last round of stitches should be closed after the next round.
The Cap
Use a smaller hook and golden yarn. Attach the yarn by inserting the hook between the legs of the last waistcoat stitch (as if doing a new waistcoat stitch), yarn-over, and pull through. This doesn’t count as a stitch. To hide the loose end of the golden yarn, crochet over it for the next rounds.
- Make 2 rounds of waistcoat stitches.
- Slip stitch into the next stitch, cut a long yarn end, and pull through the last loop.
Tighten the last slst.
Attach a needle to the yarn end. Insert the needle into the next stitch and out in the middle of the cap.
While leaving most of the golden yarn to form a large loop, bring the needle back into the cap's center, and out at the bottom of the cap, then reinserting it right next to the initial point.
Tie a knot using the large loop and the short loose yarn end. Tuck the knot and the yarn end into the cap to hide it.
Change to a hook 1 size smaller.
Make 1 ws in the first stitch and unfinished-ws the rest of the way. Every time you have 4 loops (max) on the hook, move 3 loops to a stitch marker /stitch holder (or just a piece of string). The loop you made last, keep that on the hook.
Cut a long yarn end. Pull the yarn end through all the loops on the hook and then all the loops on the stitch markers. Use a needle or a hook.
Fill the bauble - firmly for a round ball.
Tighten the yarn end and use a needle to secure it by going around in the last loops once more.
Insert the needle into the ball and let it emerge from the middle of the 'star'.
Please let me know below, if you chose this cap-less solution. - Otherwise, I might eventually remove this part :)
You are all done!
Shape the Christmas bauble by hand if needed and have a lovely crochet Christmas!
...Psst!
Waistcoat stitches are not used much with traditional patterns but are very fun to work with.
If you liked this, try other projects using waistcoat and slip stitches. You find them under the theme Waistcoat Stitch Love.
Originally published in 2022, last updated in 2024.


