Bunny Egg usually hangs out around Easter enjoying the company of Junior Egg.

Hence, the pattern for Bunny Egg has been updated and now includes Junior Egg. The two of them love that ♥
The 2-in-1 pattern is available at Ravelry, LoveCrafts or you can purchase it in the StoneGnome Payhip store. It's available in English and Danish.
If you want to try Junior Egg for FREE, then you'll find Junior right here.
Updated. This post has been updated as of March 2023
Skill level
The pattern is written for crocheters that are familiar with amigurumi. Difficulty level is intermediate/advanced. There are a few special stitches like BLO and Puff stitches. They are slightly modified, but - of course - explained.
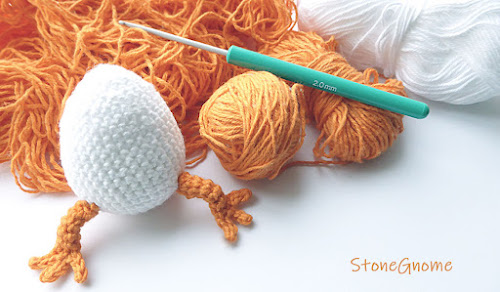
Junior is the easiest one to make, while you might need a little peace, glasses and good light when you make the legs for Bunny Egg.
Size and Yarn
The Easter Egg will be around 6.5cm tall (2.6") if you work with the recommended hook size 2-2.5mm (US 0-B1 or steel 4, UK 14-13).Use regular cotton yarn for amigurumi.
It could be something like Scheepjes Cotton 8 or similar.
Colors could be:
- 502 white
- 710 grey
- 649 soft coral (or 715 nude).
- 639 Burned Orange.

I tried Scheepjes Organicon (Ravelry link), which was soft and lovely to work with. Even a bit thick and fluffy in the right way. Totally recommend this for a luxury project and if the egg is for decoration purposes only.
However, if you plan to use the Easter Egg as a toy, the yarn might get a little worn out faster than other yarn. At least that is what I experienced when I used it for samples and had to frog it several times.
More versions
Margie helped test and proofread the original patterns. Check out her latest colorful Junior Eggs from 2023 or her very, very cute Bunny Egg on Instagram.
Thank you Margie for being such a patient and positive tester and proofreader.
Thank you Margie for being such a patient and positive tester and proofreader.

Enjoy the pattern and Easter!
Related blog post: Junior Egg