StoneGnome

Crochet Love · Crochet & Tunisian Crochet · Studying, Developing, and Teaching Crochet Techniques

  • Home/Blog
  • Crochet
    • Basic Skills
    • Beyond the Basics
    • Advanced Crochet
    • Stitches and Stitch Patterns
  • Tunisian Crochet
    • Basic Tunisian Skills
    • Beyond the Basics
    • Advanced Tunisian Skills
    • Stitches and Stitch Patterns
  • Tutorials n Guides
    • Guides
    • Step by Step Tutorials
    • Stitches and Stitch Patterns
  • Patterns
    • Free Patterns
    • Paid Patterns
  • Themes
    • Felting
    • Hats
    • Ribbing
    • Split Crochet Love (NEW)
    • Slip Stitches (ss)
    • Top Stitch
    • Amigurumi
    • Small Hearts
    • Ornaments
  • About
    • Contact Me
    • Copyright and Selling
    • Personal Data, Cookies and Marketing
Learn to crochet the Tunisian top stitch - aka bump stitch. It is a VERY easy stitch and the stitch is also very fast to work with. You crochet beautiful scarfs and more with this stitch.
Tunisian Crochet Top Stitch Tutorial

If you are new to Tunisian crochet, this is a great stitch to learn, as it is very different from other Tunisian crochet stitches.

Updated and split into two posts in September 2021. Originally from September 2016.
     

Tunisian Top Stitch

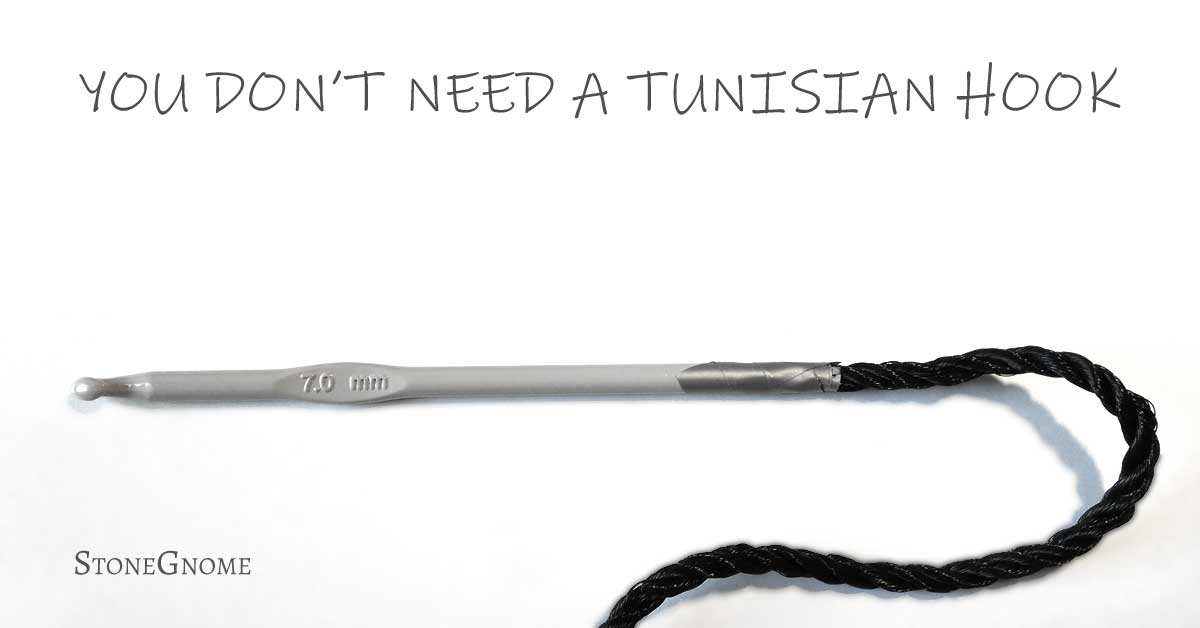
Choose a yarn and a hook that is at least two sizes bigger than the yarn label suggests. Make a foundation row of just about 10 chains - or cast on if you prefer that. Now you are ready for the first row of Tunisian Crochet Top Stitches.

Tunisian Crochet first row
Related posts:
- Tunisian Crochet Foundation Row
- Tunisian Crochet Cast On (2 hooks)
- Tunisian Single Hook Cast On (1 hook)

Forward Pass

You need to locate and hook into the 'bump' from the return passes. It's on top - and maybe a little behind - the vertical strings, we often use in Tunisian crochet. It is very similar to the back bumps of a chain row you use for a traditional foundation row.

Tilt your work a little if it helps to find the right bump.

If your last stitch of the first row got tight, it might be impossible to see or enter the first bump. So, be careful about that.

1. Insert the hook into the first bump, right next to the hook. Yarn-over (yo) and pull through one loop. You now have 2 loops on the hook. (img below)
Top stitch - insert the hook
2. *Insert the hook into a bump, yo, and pull through one loop only.*
Repeat ** till you have all 10 loops on the hook.

Return Pass

3. Left edge: Chain one (pull through one loop only).

4. *Yo and pull through two loops.*
Repeat ** till you have only 1 loop left on the hook.

You are now done with the second row :) Make a couple more rows just for practice.

Finishing Off

You end it like you do on regular crochet. Cut the yarn end and pull it through the last loop on the hook - at the right side of your work.

Tips

Tip 1. Leave extra long ends when you start and when you finish. Weaving the ends in and out takes more yarn than other stitches.

Tip 2. When you are doing a back motion, then stretch the work a little with your left hand. This gives your work a more uniform look.

Tip 3. In a return pass: When you need to pull yarn from the yarn ball, then hold on to the first loop with your index finger, so you don't accidentally pull the previous bump too tight.

Make a Scarf

Imagine a scarf made purely with the Tunisian Top Stitch. Great drape, right?!
If you want a little extra, then try the 3 Skein Scarf with the neat color change.

Have fun with it :)
Share
Tweet
Pin
No comments
When it is too warm to wear a hat, but your ears get cold, then a headband might be what you need. Here is a free pattern for you.


Share
Tweet
Pin
No comments
Tunisian Crochet - Mini Neck Warmer

Tunisian Crochet - Mini Neck Warmer
A FREE pattern is out. It is a Mini Neck warmer made of the Tunisian Top Stitch Rib.
It fits a variety of sizes and will keep your upper chest warm under your jacket.

Go have a look. You can find the free pattern at LoveCrafts and on Ravelry.

Share
Tweet
Pin
2 comments
Tunisian Crochet Hat Pattern - multisizes
I've had my beloved red ribbed hat for a while and I'm really happy about it.

The other day my 3½-year-old ran away with the hat and wouldn't return it. Later he asked if he could have one too - a red one! So the happy mom made one more red hat.

I didn't write the original pattern for small kids, but it can easily be adjusted.

Here is what to do.


Share
Tweet
Pin
No comments
Tunisian Crochet - Sideways Ribbed Hat YEAH! A new pattern has been released! It is a sideways hat. Made completely from the Top Stitch Rib pattern. I've nursed the top, so it is ribbed almost all the way to the top center.

You can find the pattern at LoveCrafts and Ravelry.
Tunisian Crochet - Sideways Ribbed Hat

A tester said: "It's is a very lightweight feeling on my head when compared to a hat made in regular crochet stitches. And much stretchier. Just all-around more comfortable."
Share
Tweet
Pin
2 comments
The back of the Tunisian Top Stitch has similarities to a chain mail when using a large hook.
It is perfect for halloween or for any everyday childrens play.


The project is fast and it doesn't matter, if you make a little mistake here and there. So feel free to try even if you just learned to do the Tunisian Top Stitch.

This is a detailed guide. Grab your yarn, measure tape, a shirt of approximately the right size and your creativity.

You need

  • scissors - for your yarn only, do NOT cut the sample shirt you found!
  • needle for sewing in ends.
  • yarn: acrylic is fine. 
    • yarn weight: DK (133m/50g or 145.5yds/1.76oz)
    • I used: Torino from Lane Cervinia - 120g (4.2oz) for a size 3-4 year old.
  • at least one size 10mm straight hook with a rubber band around the far end.
    • OR - if possible - a Tunisian hook with hooks on both ends (or make your own).


Step 1 - Draw and Measure

Get the measurements from the shirt you want to copy. If you want to adjust anything, do it now.

The top stitch is very flexible, so the sizes on my drawing makes the costume large enough to be worn on top of a jacket as well as on top of a regular shirt.

Draw a shirt before you crochet

Use Google to convert the cm into inches if you like and if you want the exact same size as I.

I took one of my 3-year olds shirts and added a little length to make room for a side seam slit.
I also changed the neck to an easier one with a slit making plenty of room for my kid's huge head.
And finally I decided to make the arms straight and not too long, as I think this goes well with a chain mail.

Notice: The top stitch likes to stretch. So when you measure the work laying flat down, it should be 10% shorter, as it stretches when worn (due to gravity). Does that 10% explanation make sense to you? If it is supposed to be 40cm (15.75in) long, then make it 36cm (14.2in) when laying flat on a table.
My measurements on the drawing are those I used, when the costumes was laying flat on a table.

AND REMEMBER: We want The BACK of the top stitch. So the side you look at, when you crochet, will be the WRONG side of the final shirt.

Step 2 - Crochet the Front and Back

You can start from the top or the beginning. The top stitch will look the same.

I started the shirt from the bottom. I regretted that, as my boy suddenly came by and wanted it to be knee length - and then changed his mind back, when he saw the result. So I had to frog the neck. It would have been easier to frog the part with the side seams. - Or at least to do a reality check on the way down there :)

Anyway - This is how you start from the bottom. Make the side seam parts. Two rectangular pieces of 6x38 cm.

Continue working in a spiral to make the back and then front at the same time: When you have the two rectangles, you start picking up loops on one of them and when you reach the end of the first one, continue on the other piece.

See ChiCrochets video for Tunisian Crochet in the Round.
Ignore that she changes colors. It just makes it easier for you to see, what she does.

If you don't want to do Tunisian in the rounds (or you only have one regular hook), you can make the front and the back separately and then slip stitch them together later.

If you work in a spiral, then remember to stop, when you get to the sleeve openings (make plenty of room here). My work measured 24cm (9.5in)here - laying flat. From here I crocheted in rows. Back and forward. Back side first and then the front side.

Neck

On the front side, I wanted a slit in the neck. Skip this part if you don't want it.

5cm (2in) from the measurement target, mark the center of the work for the neck slit. Stop crocheting, when you get to the slit and worked your way back again doing one side first. When done, cut the yarn and do the second part afterwards. This leaves a 5 cm slit in the middle.

Slip Stitch Shoulders Together

Now, stitch the back and the front together on top of the shoulders. You can use a regular slip stitch for that. Remember: You want the WRONG side to be visible. So put the front and back side together, so the wrong sides face each other. That way your slip stitches will be on the back of the costume.

Step 3 - The Arms

Remember that the top Stitch likes to stretch lengthwise? Currently there should plenty of room for the armpits. Make sure to pick up stitches anywhere possible, so there keep being plenty of space in the armpit.

Pick up stitches for the sleeves everywhere where your arms should be. Then crochet spiral-wise (or back and forward) all the way to the hand.

If you work back and forward in rows, then make the arm as a huge rectangle. The seam should be placed under the arm and will be slip stitched together.

No decreases.

When both arms are done, cut the yarn and pull it through the last loop on the hook. Hide the closing off, when you sew in ends. This shirt is for dressing up, not an everyday garment, so it doesn't matter if it looks a little rough.

Step 4 - Assembly

If you didn't work in a spiral, then you can crochet pieces together now with loose slip stitches. Remember that the BACK side of your work is the one we want to show, so put things together while you watch the front side of your work.

Weave in Ends

Weave in and lock ends
Loose yarn ends should be woven in. First in one direction for at least 5cm (2inch). Then lock it by turning the needle in the other direction and sew the thread into itself. This will prevent the yarn from getting loose.


Tadaa ! Chain Mail done!


Happy guy with his crocheted chain mail

Optional - Making Highlights

Paint highlights on your crocheted work
If you want highlights on the shirt, you can use acrylic paint. It will stiffen the yarn, but nothing serious. Just make sure you don't add too much on the shirt. It will not look good and probably crack and fall off.

Put paint on a big brush and wipe the brush off, so there isn't too much paint. Don't put pressure on the brush while painting. Paint in the direction of top to bottom only. Highlights are supposed to look like sunlight and they only come from one direction.

You should rather add a little paint at a time and then do the maneuver several times, than give it too much from the beginning.

Put it on a hanger and let it dry.

Washing

This costume should be hand washed only. The stitches are quite loose and if something catches a few threads, you will be sorry for the time spent to fix it. Also, if you have painted the costume, the paint might come off and mess with the other clothes in your machine - or the filters.


Share
Tweet
Pin
No comments
I have an excellent new ribbing for you!

I've been playing around with the Top Stich and found a very, very neat way to make an awesome ribbing. I haven't seen it anywhere else. So I dare to call this NEW!
  • Is extremely flexible 
  • It has a very soft structure
  • And the stitch pattern looks great

Share
Tweet
Pin
2 comments
3 Skein Scarf at Stonegnome
What type of scarf do you want? One pattern fits all desires.

3 Skein Scarf at Stonegnome

My newest pattern works very well for both a warm winter scarf and a light summer scarf. Plus everything in between.

The pattern is perfect for crochet beginners as well as more trained crocheters.

It is available on my designer page at LoveCrafts (in English/Danish/German) as well as in Ravelry.
Share
Tweet
Pin
No comments
I've always wanted to learn how to crochet with my left hand too. It would definitely give you some advances!

Though - come to think of it. Sometimes it is not necessary. See here how to do a Reversed Tunisian Top Stitch - aka Reversed Bump Stitch.

It is SO easy!
Share
Tweet
Pin
No comments
enhance your sweater with crochet
Do you sometimes find that some of your clothes could use something extra?

I have this lovely way-too-big sweater. It is great for a rainy day, when you just want to stay indoor doing crochet. Only thing is; the neck is too open. So my chest gets cold.

Recently a clever girl on Facebook told me, I could use Tunisian Top Stitch as a rib. So I wanted to try that on my sweater.
Share
Tweet
Pin
No comments
You've found this little project on the internet you want to try. It is Tunisian Crochet, so... do you need to buy a special Tunisian hook for it? Maybe not.
You dont need a Tunisian crochet hook

Share
Tweet
Pin
No comments
It doesn't feel long ago since I discovered the Tunisian Top Stich - aka Bump Stitch. This certainly is my favorite Tunisian stitch of today.

Tunisian Top Stitch - Front Side

I've done minor testing on different ways to use it - like for ribbing - and I think the stitch has great potential. Meaning it can unlock new possibilities for Tunisian crochet patterns.

Share
Tweet
Pin
No comments
Older Posts

Newsletter

Don't miss the next tip or pattern
from StoneGnome.

Find StoneGnome at

  • Ravelry
  • LoveCrafts
  • Littlebugz

  • Facebook
  • YouTube
  • Pinterest
  • Instagram

Popular Posts

  • Tunisian Crochet Cast On
  • Free Snowflake Pattern
  • Tunisian Single Hook Cast On
  • A Valentines Heart for You
  • Avoid an Ugly Slip Knot

Labels

advanced amigurumi basic beads Bornholm christmas crochet crochetChart easter edge felting filetcrochet freePattern guide hat miteredCorner ornament paidPattern pattern ribbing shoes slipStitch spiral Split Crochet stitchPattern topStitch tunisian tutorial

recent posts

My favorite Links

  • My designs at LoveCrafts
  • My designs at Ravelry
  • My design page at Littlebugz.dk
  • Annie's Catalog
  • Designing Vashti
  • Crochet Kim
  • Free Vintage Crochet
  • Stitch Fiddle
  • Stitchboard · Pattern Wizard
FOLLOW STONEGNOME @INSTAGRAM

    Powered by Juicer.io

Ⓒ StoneGnome · Created with · by BeautyTemplates