StoneGnome

Crochet Love · Crochet & Tunisian Crochet · Studying, Developing, and Teaching Crochet Techniques

  • Home/Blog
  • Crochet
    • Basic Skills
    • Beyond the Basics
    • Advanced Crochet
    • Stitches and Stitch Patterns
  • Tunisian Crochet
    • Basic Tunisian Skills
    • Beyond the Basics
    • Advanced Tunisian Skills
    • Stitches and Stitch Patterns
  • Tutorials n Guides
    • Guides
    • Step by Step Tutorials
    • Stitches and Stitch Patterns
  • Patterns
    • Pattern Posts
    • StoneGnome Shop ♥
    • Visit Ravelry
    • Visit LoveCrafts
  • Themes
    • Slip Stitches (ss)
    • Felting
    • Hats
    • Ribbing
    • Waistcoat stitch Love
    • Top Stitch
    • Amigurumi
    • Small Hearts
    • Ornaments
    • Seasonal Themes n more
  • About
    • Contact Me
    • Copyright and Selling
    • Personal Data & Privacy
The holiday season is here - read on for last-minute Christmas crochet inspiration! Handmade ornaments bring extra warmth to your decorations and make wonderful last-minute gifts.

Crochet Christmas Patterns

Small crochet ornaments are perfect for busy days or when you need a relaxing creative break. Each is like a little piece of handmade magic, adding a personal and cozy touch to your home.

Free Christmas Crochet Patterns

Here are some of my favorite patterns to inspire you this season.

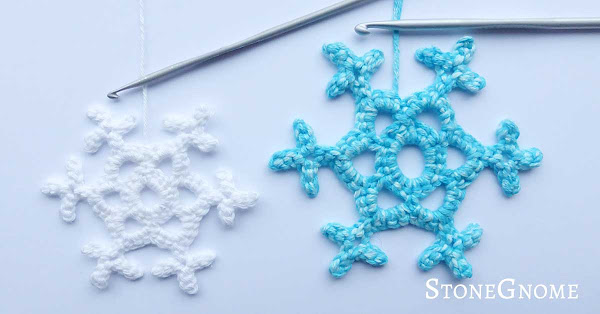
Snowflakes will always have a special place in my heart. They brighten up winter days and make delicate window decorations that last well beyond Christmas.

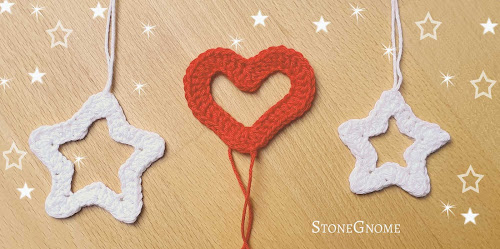
The stars and hearts add their charm to everything. Timeless and versatile for any occasion, including Christmas. You really can't go wrong with those.

  • Snowflake No.1
    Bright, delicate, and perfect for winter window decorations.
  • Snowflake No.2
    The sister of Snowflake No.1, with its own unique charm.
  • Sibling Stars
    Easy and relaxing to make, with a festive touch.
  • A Little Christmas Heart
  • World Heart Day
  • Double Heart
  • Striped Christmas Bauble
    Now with a cap! - This might take a little longer to crochet, so make this for someone special.
  • A Curly Border
    The twisted sc border adds a special touch to your work. Find it on Instagram - Swipe for video.
Whether you hang these ornaments on the tree, place them in a window, or gift them to someone special, they’re sure to bring warmth and joy to the season.

I’d love to see your creations and how you use these patterns! Tag me @stonegnomedesign on Instagram, so I can find your posts.

Wishing you a warm and creative Christmas season!

Sincerely,
Heidi aka StoneGnome
Originally published in December 2018, updated in 2024.
Share
Pin
2 comments
It’s cold and dark outside. So, have a happy hour with tea, a blanket, and a new little crochet project.
Crocheted Christmas Bauble
I've worked on different Christmas bauble ornaments, or Xmas balls the last few years. The first pattern is available below. Yeah!

Skills

The bauble is an intermediate/advanced project. If you are familiar with waistcoat stitches and slip stitches, the Christmas ball pattern is likely trouble-free and you can go straight to the yarn-hook suggestions and the pattern notes.

If the stitches - or this way of using them - are fairly new to you, a little extra effort might be required at first. I promise you, getting to know the stitches better is very well worth it.

Want more details about this way of working? Read: Tessa's Triangles - Hexagon Pattern

You should feel comfortable making uniform stitches of all kinds and it is also good to know how to adjust the tension of your work. - If not, read this one: How to Change and Control Your Tension

A Note about your Hook

A perfect hook for waistcoat stitches has a head that is slightly smaller than the neck and is pointy or has a lip/nose that makes it easy to insert the hook between the legs of the previous stitch.

Remember. We should always use the neck of the hook to determine the size of our stitches - and avoid tightening them after the loop leaves the hook. With waistcoat stitches, it is even more important or it will be difficult to make the following round.

Read about wellformed waistcoat stitches here: Waistcoat Stitch and Stitch Patterns in Rounds.

Yarn-Hook & Size

The bauble should be rather small to keep it light. A Catona-yarn-bauble like mine will be around 5cm (2") wide/tall.

I used:
  • Scheepjes Catona (Ravelry) 125m/50gr (138 yds/1.76oz)
  • hook size 4mm for the main parts and 3mm for the final round (US G6 and D3, UK 8 and 11).
However, any cotton yarn doable for amigurumi should work with this pattern. It could be cotton yarn with yardage 170m/50gr (186 yds/1.76oz) and hook size 3-3.5mm (US D3-E4, UK 10-9). For the final round use a slightly smaller hook for a nicer closing.

Crochet Christmas Balls

The Striped Bauble Pattern

The bauble is worked in rounds in a continuous spiral. (No joining with a slip stitch after each round).
Make not-tight stitches to make it easy to work with. Be thorough with the size of your chains. Adjust accordingly if needed, like when you change color.

Use a stitch marker or a long piece of yarn to mark the beginning of a round.

Use 3-4 stitch markers or tiny stitch holders for the final round.

Special Stitches

Slip stitch BLO decrease (slst-blo-dec). Hook into back loops only (blo). Hook into the next two stitches in reverse order. Yarn-over and pull through all loops. For more info and a video, see Slip Stitch Tutorials - Part III.

Unfinished-ws. Insert the hook between the legs of a stitch, yarn-over and pull up a loop, yarn over, and pull through one loop only. Keep the extra loop on the hook.

Waistcoat stitch decreases (cap version only). Insert the hook between the legs of the next stitch, yarn-over and pull up a loop, do the same for the next stitch so you have 3 loops on the hook, yarn-over and pull through all loops on the hook.

Abbreviations

ch = chain
sc = single crochet stitch
ws = waistcoat stitch
ws-c = Ws with a color change (see below)
slst-blo = slip stitch in the Back Loop Only (blo)
slst-blo-c = slip stitch BLO with a color change
slst-blo-dec = slip stitch decrease - in the back loop only
* * = Repeat instructions within * * all the way round
( ) = Repeat instructions within the parentheses as many times as instructed.
[ ] = number of stitches in the round

Color changes are marked ‘-c’. Change color while pulling up the last loop of a stitch, so the new color is ready for the next stitch. For slip stitches, pick up the new color immediately.

Instructions

Foundation
With red yarn. Make 6 loose sc in a Magic Ring. Pull the Magic Ring loosely together. [6]

1st Half of the Red Ball
  1. *1 ws in the first sc,1 ws-c in the same/current sc,
    ch-c 1 (change color to red immediately). *
    Repeat from * to * all the way. [18]

  2. Keep changing color so all ws appear red and all slst appear white.
    * With red. 1 ws in the ws,
    1 ws-c in the next stitch.
    With white; 1 slst-blo in the chain,
    1 slst-blo-c in the ws *.
    Repeat all the way. Start the repeats in the CURRENT ws. [24]

  3. This round you will have 3 white slst between the ws.
    * 1 ws in the current stitch,
    1 ws-c in the next stitch,
    1 slst-blo in each slst,
    1 slst-blo-c in the ws * [30]

  4. Repeat round 3. This round you will have 4 white slst. [36]

  5. Repeat round 3. This round you will have 5 white slst. [42]
Tighten the Magic Ring and weave in the yarn end from the beginning of the work. - Or - if you dare try if it will work for you, just tuck the loose end inside the bauble with or without a knot. - I mostly don't make a knot, mine are fine as long as they are only used for decoration purpose.

2nd Half of the Red Ball

  1. Begin this round in the ‘current ws’ and make the repeats from the ‘next ws’.
    * 1 ws in the ws,
    1 ws-c in the next ws,
    1 slst-blo in the next 4 slst,
    1 slst-blo-c in the last slst * [42]

  2. Repeat the previous round. [42]
Prepare to fill the bauble. Depending on your tension, yarn, and more, the white part might arch inward. Use it if you like, or fill the bauble firmly in the end, if you want a very round ball.

  1. * 1 ws in the ws,
    1 ws-c in the next ws,
    1 slst-blo-dec,
    1 slst-blo in the next 2 slst,
    1 slst-blo-c in the last slst * [36]

  2. * 1 ws in the ws,
    1 ws-c in the next ws,
    1 slst-blo-dec,
    1 slst-blo in the next slst,
    1 slst-blo-c in the last slst * [30]

  3. * 1 ws in the ws,
    1 ws-c in the next ws,
    1 slst-blo-dec,
    1 slst-blo-c * [24]

  4. * 1 ws in the ws,
    1 ws-c in the next ws,
    1 slst-blo-dec-c in the slst. * [18]

  5. * 1 ws in each ws * (Skip all slst). [12]
If you don't want a cap, head directly to the Final Round (No Cap). Otherwise, prepare for the cap. Use the colored yarn.

  1. Make waistcoat stitch decreases all the way [6]
slst and cut the colored yarn, Pull the yarn end through the loop. Secure ends. A little knot using the white and colored yarn should be fine. Tug the loose ends into the bauble. Gaps between the last round of stitches should be closed after the next round.

The Cap

Use a smaller hook and golden yarn. Attach the yarn by inserting the hook between the legs of the last waistcoat stitch (as if doing a new waistcoat stitch), yarn-over, and pull through. This doesn’t count as a stitch. To hide the loose end of the golden yarn, crochet over it for the next rounds.

  1. Make 2 rounds of waistcoat stitches.

  2. Slip stitch into the next stitch, cut a long yarn end, and pull through the last loop.
    Tighten the last slst.
Create a loop for hanging the ornament
Attach a needle to the yarn end. Insert the needle into the next stitch and out in the middle of the cap.

While leaving most of the golden yarn to form a large loop, bring the needle back into the cap's center, and out at the bottom of the cap, then reinserting it right next to the initial point.
Tie a knot using the large loop and the short loose yarn end. Tuck the knot and the yarn end into the cap to hide it.

Change to a hook 1 size smaller.

Make 1 ws in the first stitch and unfinished-ws the rest of the way. Every time you have 4 loops (max) on the hook, move 3 loops to a stitch marker /stitch holder (or just a piece of string). The loop you made last, keep that on the hook.

Last round of the Christmas Ball

Cut a long yarn end. Pull the yarn end through all the loops on the hook and then all the loops on the stitch markers. Use a needle or a hook.

Insert a needle

Fill the bauble - firmly for a round ball.
Tighten the yarn end and use a needle to secure it by going around in the last loops once more.

Closing the Christmas Ball

Insert the needle into the ball and let it emerge from the middle of the 'star'.

Striped Christmas Bauble Crochet Pattern

Please let me know below, if you chose this cap-less solution. - Otherwise, I might eventually remove this part :)

You are all done!

Shape the Christmas bauble by hand if needed and have a lovely crochet Christmas!

...Psst!

Waistcoat stitches are not used much with traditional patterns but are very fun to work with.
If you liked this, try other projects using waistcoat and slip stitches. You find them under the theme Waistcoat Stitch Love.
Originally published in 2022, last updated in 2024.
Share
Pin
No comments
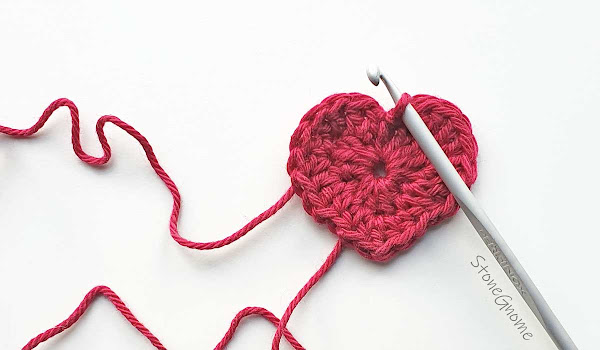
This heart was made for#WorldHeartDay (sep 2022), but it also works perfectly for Valentines Day.

World Heart Day - free crochet pattern

Use the heart to remind you of what is important in your life and what makes you happy. ❤ 

Written Pattern

Use any yarn and hook that works for you. I used Scheepjes Catona and hook 3.5 mm (US E/4- UK 9)

Abbreviations
(US terms)
ss    - slip stitch
ch    - chain
sc    - single crochet
hdc  - half double crochet
dc    - double crochet
[ ]    - all in the same stitch

Make a Magic Ring. Work 1st round in the Magic Ring.

Round 1 
Ch 1, 3 dc, 2 sc, 1 hdc, 1 dc, 1 hdc, 2sc, 3 dc, ch1 and 1 sc in the ring.
Pull the magic ring semi-tight.

Round 2 
sc in the chain, (2dc in the next st) x 4, 
1 hdc in the sc, 1 hdc in the hdc,
[1 hdc, 1 dc, 1 hdc] in the dc, 
1 hdc in the hdc, 1hdc in the sc, 
(2dc in the next st) x 4, 
1 sc in the chain, 1 ss in the sc.

Pull the magic ring as tight as possible (don't break the yarn). Cut the yarn and pull at the last loop on the hook till the strand is free. Pull tight and weave in ends.

Pattern Chart

If you prefer a chart, then see below. I will post these on Instagram too. 

Round 1 starts at the red dotted line. Round 2 starts at the blue dotted line.

❤ StoneGnome


If you want more hearts, then check out my other small heart posts. I love hearts ❤
Share
Pin
2 comments
It's time for Christmas Crocheting.
Christmas Ornament Patterns

Here are links to some free Christmas crochet patterns to you from StoneGnome.

Little ornaments are great to crochet and hang in the window or on a Christmas tree. They are also pretty fast to make, which is excellent if you have busy days or just need something easy to make.

I love the crochet snowflakes. They are small, bright, and last all winter as window decorations. And btw, there are two different versions. The second snowflake might have been hiding, so use the link below :)

I also love hearts; you can use them for more yearly occasions. And then of course the pretty stars. Very easy and relaxing to make.
  • World Heart Day
  • Snowflake #1
  • Snowflake #2
  • A Little Christmas Heart
  • Sibling Stars
  • Double Heart

Christmas Crochet Ideas

If you get into it and suddenly have a lot of crochet beauties, then use the crocheted items as part of your Christmas wrapping for a more personalized look and feel on the presents. Or make a tree branch mobile by hanging ornaments on a pretty curly branch from the garden.

Happy Christmas Crocheting!
Share
Pin
No comments
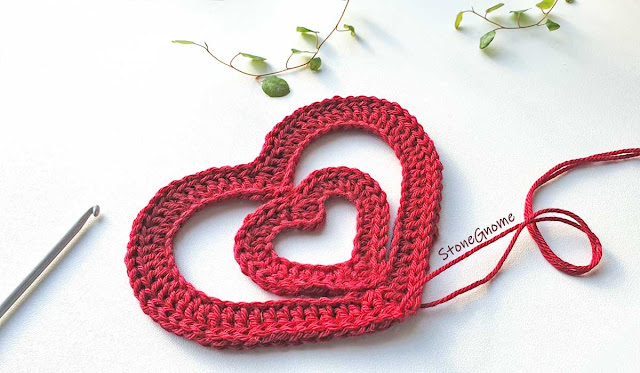
This adorable double heart is double love. Give it to someone extra special or make it for your own joy.

Double Heart - Crochet Pattern

The heart ornament is made in one piece, so there is no sewing the parts together in the end.

Share
Pin
No comments
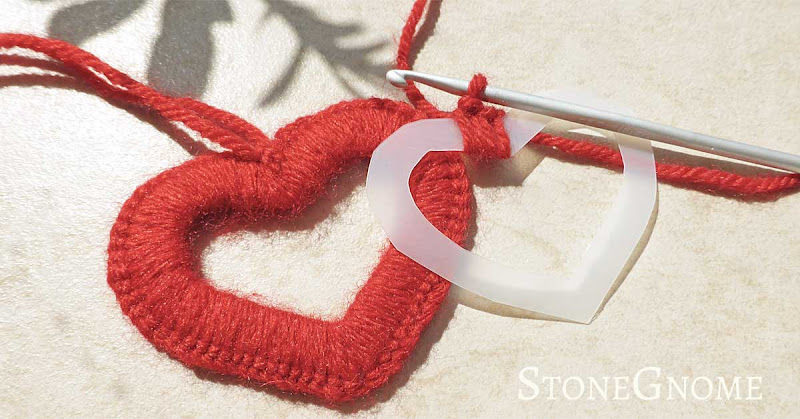
Let us end the year by being kind to ourselves and each other. I have a FREE little heart-shaped crochet love for you. 
Crochet a little heart with a crocheted string
Hang it on the Christmas tree, as decor for a present or just make one if you need a break during the holidays. 

Share
Pin
No comments
To all the little stars in the world. Crochet a little star or two. 
Crocheted Stars

In a few weeks, it is December 1st. I'm not good at being ahead of the season, but this year my sweet kids started making little ornaments a while ago, so I joined them. 

Making the star pattern was a bit frustrating at first. :) Sometimes making things very simple is difficult. I also wanted it to somehow match the Valentine's heart, which can be used as a Christmas decoration as well.
Read more: See more hearts at Stonegnome

I think they will look good together in a window or at the Christmas tree.

Crocheted star and heart

Below is the crocheted star pattern. Have fun ❤️

Star Pattern

While working on the pattern it can be difficult to see the star shape. The further you get, the better it should be, and once blocked and shaped, it should be just how you want it.

Little star: around 5cm wide (2")
Medium star: around 6cm wide (2.4").

  • hook size 2.25-2.5mm (US: B/1, UK 13)
  • cotton yarn. Yardage around 170m/50g (185y/1.76oz)
  • optional. A stitch marker.
  • glasses, if needed.
Abbreviations (US terms)
ss = slip stitch
ch = chain
hdc = half double crochet
dc = double crochet
tr = treble crochet
yo = yarn over
[ ] = instructions for the medium star

Foundation
Chain 30 [medium star, chain 40]. Join with a ss to make a ring.
Optional. Turn the work, so you can see the back bumps of your chains. Hook into the back bumps.

1) chain 3
2) 1 dc and 1 hdc in the base of the 3 chains
3) 1 hdc in the next chain [medium star, repeat the line]

Now make a cluster-decrease of two hdc with a skipped chain between. like this:

4) yo, insert the hook into the next chain and pull up a loop
5) skip a chain
6) yo, insert the hook into the next chain and pull up a loop
7) yo and pull through all 5 loops on the hook

Continue with:

8) 1 hdc in the next chain [medium star, repeat the line]

Star point
Tip: when working a lot of stitches into a single chain, the chain right AFTER might get very tight. Avoid it being tight by inserting a stitch marker into it before you start the previous group of stitches.

9) (optional. Place a stitch marker in the second chain from the hook)
    Make 5 stitches in the next chain (= the first chain from the hook): 1 hdc, 1 dc, 1 tr, 1dc, 1hdc

Continue with:

10) (optional. Remove the stitch marker)
      1 hdc in the next chain [medium star, repeat the line]

Repeat from line 4 until you reach the last star point, which is already halfway done.
(The initial 3 chains you made in the beginning, are substituting the tr.)

11) In the base of the 3 chains make two more stitches: 1hdc, 1dc

Join with a ss, cut the yarn, and secure it by pulling it through the last loop on the hook. Sew in the yarn end from your foundation chain. Make it come out at the top of the star. Use the two yarn ends for hanging up the ornament.

Wash and block* it for a perfect shape and you've got a star!

Let me know if you find any typos in the pattern. ❤️


*Wash and block
I highly recommend blocking for the best final touch.

Handwash the star. Press out excess water by wrapping it in a towel. Place the star on a flat surface and pull the outer and inner star points till you are happy with the shape. Use water-safe needles and a foamboard or likewise if you prefer - I just do it freehand.

The star points can be pointed or more rounded. Let the star dry.

Make a Whole Family of Stars

You might have figured out by now how to make an even bigger star. Every time you add 10 more chains to the foundation row you go up one size. And the line with 1 hdc is also repeated once more (lines 3, 8, 10).

I tried and ended up with 4 different sizes of stars. After blocking and a little nursing, even the bigger one got very good.

Crocheted star family

I'm not sure how far you can go and keep the shape, but feel free to try :) Just be aware that the larger the star, the more wobbly it will be and you might need to use stiffener if it is to be hung up.

Tag me on Instagram @stonegnomedesign to show me your star(s).


Enjoy!


Sell & Share
You are welcome to sell/share any products you make from my patterns. For further information look at Copyright and Selling

Snowflakes

If you like crocheted Christmas ornaments, try the two snowflakes too - Snowflake 1 and Snowflake 2
Crocheted snowflakes
Share
Pin
No comments
This December has been all about rain and rain and rain, so I've made a free snowflake pattern that pair up well with the one I made almost two years ago.
Free Snowflake Crochet Pattern

This is my X-mas present for you.

Share
Pin
No comments
A Crocheted Heart for Mother's Day
Crochet a heart for Mother's Day.

A Crocheted Heart for Mother's Day

This one doesn't need blocking, but it is still super cute and easy to do.
Share
Pin
No comments
Here is a beautiful open Valentine's Heart for you. It is a free pattern.

Valentines Heart - crochet pattern

Use it for decoration or as a bookmark.

Share
Pin
1 comments
Here is a free snowflake pattern for you, that can bring bright snow into your life.
Free Crochet Snowflake Pattern

Use it for Christmas or use it as decoration, when other Christmas decorations are put away and everything feels a bit empty and dark.

Share
Pin
1 comments
Christmas gets closer every day. All full of love and (Xmas) hearts. Here is a free heart pattern for you.

Crochet Filet Heart Table Topper

I'll guide you at the beginning of the diagram as well as at the parts, when new things happen. So even if you are a newbie, you should be able to finalize this.

Share
Pin
No comments
Older Posts

Newsletter

Don't miss the next tip or pattern
from StoneGnome.

Find StoneGnome at

  • Ravelry
  • LoveCrafts
  • Littlebugz

  • Facebook
  • YouTube
  • Pinterest
  • Instagram

Loop Legends

  • From Image to Crochet Chart
  • How to Find Your Gauge
  • Mini Neck Warmer
  • Guide: Splitting Yarn
  • You Don't Need a Tunisian Crochet Hook
  • Crochet (Sea)Grass and Succulents
  • Chain Mail Shirt
  • Minor Felting Mishaps

My favorite Links

  • StoneGnome Pattern Shop
  • StoneGnome at Ravelry
  • StoneGnome at LoveCrafts
  • Crochet Kim
  • Annie's Catalog
  • Designing Vashti
  • Stitch Fiddle
  • Stitchboard · Pattern Wizard
  • Free Vintage Crochet

Labels

Bornholm Split Crochet advanced amigurumi basic beads christmas crochet crochetChart easter edge felting filetcrochet freePattern guide hat miteredCorner ornament paidPattern pattern ribbing shoes slipStitch spiral stitchPattern topStitch tunisian tutorial

All Crocheticles

  • ▼  2025 (2)
    • ▼  February (1)
      • Waistcoat Stitch Colorwork
    • ►  January (1)
  • ►  2024 (6)
    • ►  December (1)
    • ►  November (1)
    • ►  October (2)
    • ►  April (1)
    • ►  March (1)
  • ►  2023 (7)
    • ►  September (2)
    • ►  June (2)
    • ►  March (1)
    • ►  February (1)
    • ►  January (1)
  • ►  2022 (3)
    • ►  November (1)
    • ►  April (1)
    • ►  February (1)
  • ►  2021 (9)
    • ►  November (1)
    • ►  October (3)
    • ►  September (2)
    • ►  May (1)
    • ►  March (1)
    • ►  February (1)
  • ►  2020 (15)
    • ►  December (1)
    • ►  November (1)
    • ►  October (2)
    • ►  May (2)
    • ►  March (2)
    • ►  February (3)
    • ►  January (4)
  • ►  2019 (8)
    • ►  December (2)
    • ►  October (2)
    • ►  September (1)
    • ►  May (1)
    • ►  March (1)
    • ►  February (1)
  • ►  2018 (15)
    • ►  June (3)
    • ►  May (1)
    • ►  April (4)
    • ►  March (1)
    • ►  February (4)
    • ►  January (2)
  • ►  2017 (48)
    • ►  December (4)
    • ►  November (3)
    • ►  October (2)
    • ►  September (5)
    • ►  August (5)
    • ►  July (3)
    • ►  June (5)
    • ►  May (3)
    • ►  April (4)
    • ►  March (5)
    • ►  February (5)
    • ►  January (4)
  • ►  2016 (25)
    • ►  December (5)
    • ►  November (7)
    • ►  October (5)
    • ►  September (4)
    • ►  August (4)
FOLLOW STONEGNOME @INSTAGRAM

    Ⓒ StoneGnome · Created with · by BeautyTemplates