StoneGnome

Crochet Love · Crochet & Tunisian Crochet · Studying, Developing, and Teaching Crochet Techniques

  • Home/Blog
  • Crochet
    • Basic Skills
    • Beyond the Basics
    • Advanced Crochet
    • Stitches and Stitch Patterns
  • Tunisian Crochet
    • Basic Tunisian Skills
    • Beyond the Basics
    • Advanced Tunisian Skills
    • Stitches and Stitch Patterns
  • Tutorials n Guides
    • Guides
    • Step by Step Tutorials
    • Stitches and Stitch Patterns
  • Patterns
    • Pattern Posts
    • StoneGnome Shop ♥
    • Visit Ravelry
    • Visit LoveCrafts
  • Themes
    • Slip Stitches (ss)
    • Felting
    • Hats
    • Ribbing
    • Waistcoat stitch Love
    • Top Stitch
    • Amigurumi
    • Small Hearts
    • Ornaments
    • Seasonal Themes n more
  • About
    • Contact Me
    • Copyright and Selling
    • Personal Data & Privacy
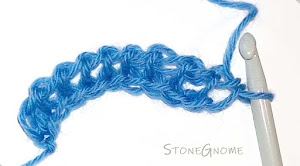
The twisted single crochet stitch adds charm to your project without too much fuss. Perfect for a simple border to frame your crochet work.

Make a twisted single crochet stitch for a border

Also, we’ve all had an edgy border, that could use a little LTC. The Twisted Single Crochet Stitch will help you do that. It is simple and easy to do. 

The twisted single crochet stitch is an excellent alternative to the crab stitch or the reverse single crochet stitch.

Note for British Crocheters - The term single crochet (SC) in US patterns corresponds to the double crochet (DC) in British terminology.

The Twisted Single Crochet Stitch - Instructions

  1. Insert your hook into the next stitch and pull up a loop.

  2. Pro tip: Expand the stitch a little - about twice as tall as usual. This makes the twist stand out and keeps the border softer and easier to work with.

    Pull up a tall loop


  3. Next, gently turn your hook towards yourself and all the way around. Counter-clockwise if you are right-handed (clockwise if you’re left-handed). This twists the loops on the hook. 

    Turn or twist the hook around

    Twist the single crochet stitch


  4. Finish the stitch with a yarn-over and pull through all loops.

    Finish the crochet stitch as usual


That’s it. The twisted single crochet stitch is simple, yet so effective! If you’d rather follow along with a video, you can check it out here.


Hearts to Love

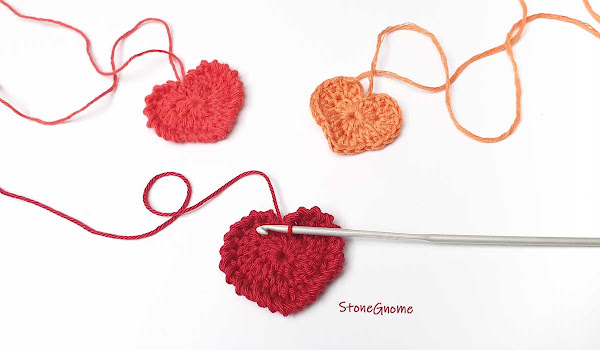
Looking for a heart pattern to pair with the twisted single crochet stitch? Try the World Heart Day crochet pattern!.

World Day Heart Crochet Pattern

For more heartwarming designs, explore the other heart patterns here at stonegnome.com. 

Share
Pin
No comments

Most of us cannot crochet with both hands. Though sometimes it would be useful to be able to.

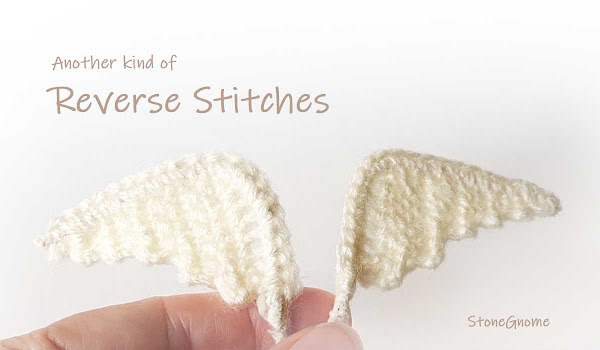
Another kind of reverse stitches

When I made wings for a pumpkin (yes, for a pumpkin, a Halloween pumpkin), I wanted the reverse side of the second wing to look like the front side. Including the small ridges. 

Updated September 2023

It would have been great if I could have worked the second wing with my left hand. Then it would truly be 'mirrored' versions of the same item.

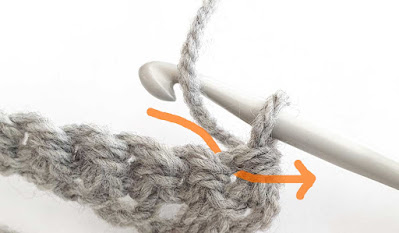
There is an alternative. In Tunisian crochet, there is something called 'reverse stitches'. Reverse stitches in the world of regular crochet are usually related to stitches like the 'crab stitch', where you crochet in the opposite direction (right-handed work from left to right).

However, with Tunisian crochet, the reverse stitches are not made in a different direction but on the reverse side of the work.

All you do is: 

  • Position the yarn in front of the hook and your work. 
  • Then, insert the hook from BEHIND the work into the regular stitch. 
  • Yarn-over, pull up a loop and complete the stitch as usual.

Regular crochet - reverse stitches
This is really all there is to it, and it can be done with regular crochet too.

Video

If you prefer a video to see how it can be done, then I made one for you here.


Try it. Practicing reverse stitches is just like learning any other new stitch. It might seem uncomfortable in the beginning, but then it gets easier and easier until it feels like a piece of cake.

:)
Share
Pin
No comments
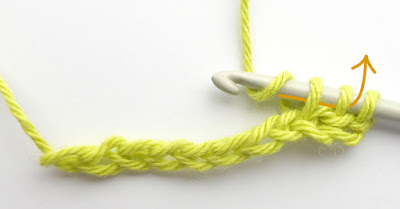
Tunisian Crochet is fun and can be very meditative. Here is how you make a traditional foundation row to get started.
Tunisian Crochet Founcation Row

If you are a newbie to Tunisian Crochet, try it!

Updated September 2021. Originally posted as part of the Tutorial: Tunisian Top Stitch from 2016.

Tunisian Crochet in General

Is this your first try on Tunisian Crochet? If so, you should know it is all about a forward motion/ forward pass and a back motion/return pass. On the forward pass, you pick up loops. On the return pass, you finalize each of the crochet stitches.

You also insert the hook a little different from regular crochet in most cases - as you have other options here - which makes the stitches look a bit different too.

However, the way you work each of the stitches is still crocheting.

The outcome of a Tunisian Crochet piece can be a lot more like knitting, which is great for the drape and thereby for making wearables, scarfs, and other soft crochet pieces.

Tunisian Foundation Row

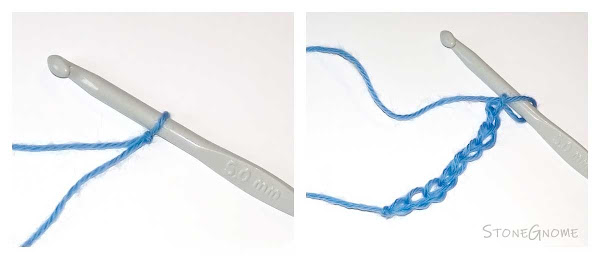
Choose a yarn and a hook that is at least two sizes bigger than the yarn label suggests. Most hooks will easily have space for 10 stitches on the neck. Else, just make fewer chains in this tutorial.

1) Chain row
Make a slip stitch and insert the hook. Crochet 9 chains for a foundation. This will give you 10 stitches, as the loop on your hook is number 10.
Tunisian Crochet Chain Row

Now turn your work sideways, so you can see all the bumps that might usually be on the back of your work. These are the loops you will insert the hook into.
Tunisian Crochet - hook into the back bumps

2) Forward Pass - pick up loops
Insert your hook into the first bump, right next to the hook. (Some skip the first bump and it CAN be difficult to hook into. So if it suits you better, do that.)

Yarn over (yo) and pull through one loop. You now have 2 loops on the hook. They stay there during the forward motion.

Tunisian Crochet - make the first stitch


*Insert the hook into the next bump, yo, and pull through one loop only.* Repeat this till you have used all bumps. When you have reached the end, you have 10 loops on your hook.
Tunisian Crochet - forward pass

3) Return Pass - complete each stitch
Chain one. (Yo and pull through one loop only). This is the left edge of your work.
Tunisian Crochet - left edge

*Yo and pull through two loops.* Repeat until you only have one loop left on the hook.
Tunisian Crochet - return pass

AVOID the temptation to pull tight, when there is only one loop left on the hook. You can tighten your work so much, that it is difficult to proceed from here with a nice result.

Tunisian Crochet - Foundation Row

Tadaa!! Now you are ready for your next row :)

From here most people learn the Tunisian Simple Stitch (tss), the most commonly known stitch in the Tunisian Crochet world.

You could also try something nice and a bit different like the lovely Tunisian Top Stitch. It's one of my favorite stitches and it doesn't get enough attention in the crochet world.

You will find a tutorial right here: Tutorial: Tunisian Top Stitch

Did You Know?

Instead of starting with a chain row, it is also possible to do a cast-on. You can either do the Tunisian Single Hook cast on or the Tunisian Crochet Cast On. The last one requires two hooks but is really beautiful and very popular on this site.

Tunisian Crochet Cast On - Single Hook
Tunisian Crochet Cast On - Two Hooks

Choose whatever works best for you with a specific Tunisian Crochet Project.
Share
Pin
No comments
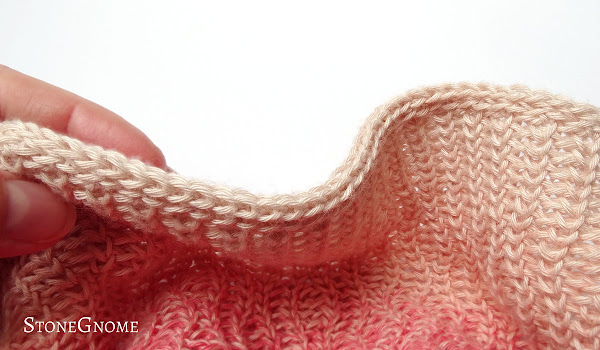
Learn to crochet the Tunisian top stitch - aka bump stitch. It is a VERY easy stitch and the stitch is also very fast to work with. You crochet beautiful scarfs and more with this stitch.
Tunisian Crochet Top Stitch Tutorial

If you are new to Tunisian crochet, this is a great stitch to learn, as it is very different from other Tunisian crochet stitches.

Updated and split into two posts in September 2021. Originally from September 2016.
     

Tunisian Top Stitch

Choose a yarn and a hook that is at least two sizes bigger than the yarn label suggests. Make a foundation row of just about 10 chains - or cast on if you prefer that. Now you are ready for the first row of Tunisian Crochet Top Stitches.

Tunisian Crochet first row
Related posts:
- Tunisian Crochet Foundation Row
- Tunisian Crochet Cast On (2 hooks)
- Tunisian Single Hook Cast On (1 hook)

Forward Pass

You need to locate and hook into the 'bump' from the return passes. It's on top - and maybe a little behind - the vertical strings, we often use in Tunisian crochet. It is very similar to the back bumps of a chain row you use for a traditional foundation row.

Tilt your work a little if it helps to find the right bump.

If your last stitch of the first row got tight, it might be impossible to see or enter the first bump. So, be careful about that.

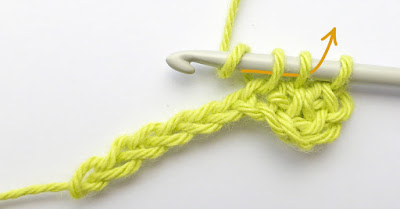
1. Insert the hook into the first bump, right next to the hook. Yarn-over (yo) and pull through one loop. You now have 2 loops on the hook. (img below)
Top stitch - insert the hook
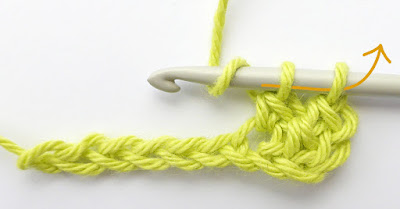
2. *Insert the hook into a bump, yo, and pull through one loop only.*
Repeat ** till you have all 10 loops on the hook.

Return Pass

3. Left edge: Chain one (pull through one loop only).

4. *Yo and pull through two loops.*
Repeat ** till you have only 1 loop left on the hook.

You are now done with the second row :) Make a couple more rows just for practice.

Finishing Off

You end it like you do on regular crochet. Cut the yarn end and pull it through the last loop on the hook - at the right side of your work.

Tips

Tip 1. Leave extra long ends when you start and when you finish. Weaving the ends in and out takes more yarn than other stitches.

Tip 2. When you are doing a back motion, then stretch the work a little with your left hand. This gives your work a more uniform look.

Tip 3. In a return pass: When you need to pull yarn from the yarn ball, then hold on to the first loop with your index finger, so you don't accidentally pull the previous bump too tight.

Make a Scarf

Imagine a scarf made purely with the Tunisian Top Stitch. Great drape, right?!
If you want a little extra, then try the 3 Skein Scarf with the neat color change.

Have fun with it :)
Share
Pin
No comments
This border is bold and flexible and can be used with all kinds of projects. It is also the 4th and final part of the StoneGnome Infinity Scarf.
Crochet a bold Flexible Border. Almost like an iCord.

I promised to show you the border today, but don't despair if you are still working on the flames stitch patterns.

Share
Pin
No comments
Learn how to expand the Little Flames pattern and add shadows.
StoneGnomes Crocheted Infinity Scarf

Last time we did the Little Flames. There are many other ways of doing patterns with waistcoat stitches and chains, though. So, let's try one.

Share
Pin
No comments
Today I’ll show you how to do the first cable-like stitch pattern.

Share
Pin
No comments
Happy Valentines! Let us do the first part of the StoneGnome Infinity Scarf. I have released the new video for the CAL.
StoneGnomes Crocheted Infinity Scarf - The Beginning

I'll recommend that you watch the full video at least once. There are several tips in there, you might need. Later, you can get back here and use the notes for a better overview.

Share
Pin
No comments
The introduction is now available on YouTube. :)

See the video or read about the scarf here.

Share
Pin
No comments
I see a lot of questions these days about how to get circles like Rozeta* - but also squares - to lay flat and avoid the wonky look.
Dahlia Washcloths being a bit wonky
How to avoid the Wonky Look on your crocheted items

There are more things you can do to avoid wavy edges.

Share
Pin
No comments
You really don't need that little knot in the beginning of your next crochet project. Here is a video showing how to avoid it.

It works with regular crochet as well as Tunisian and it doesn't matter how you like to hook into your starting chain.

Share
Pin
1 comments
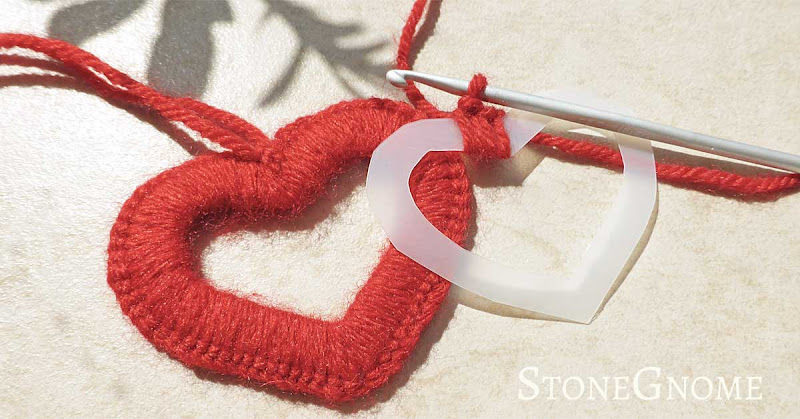
A Crocheted Heart for Mother's Day
Crochet a heart for Mother's Day.

A Crocheted Heart for Mother's Day

This one doesn't need blocking, but it is still super cute and easy to do.
Share
Pin
No comments
Sometimes it is difficult to join or sew two pieces together and make it look good.

Tunisian Reverse Stitches - The Sides

If you have ever considered working with the Tunisian Reverse Stitch, you might want to read along here.

Share
Pin
No comments
We love new stitches. And being an experienced crocheter, you might sometimes think, you have seen it all.

A Lovely HDC Variant

Then a new stitch pops up and makes everyone excited.

Share
Pin
No comments
What if you want to cast on for your Tunisian project and only have one hook?

Tunisian Crochet Cast On - Single Hook

Here is a way to do that. And this technique might be even easier than the two-hooks casting on.

Share
Pin
2 comments
I have always admired, when knitters did a cast on and 1-2-3 got thousands of loops on their hooks... eh, needles.

Tunisian Crochet Cast On - Chainless

You can also cast on when doing Tunisian crochet - as in without a starting chain. And it is much faster than doing chains first.

Share
Pin
7 comments
In my last blog post, I showed you how to link stitches. I also have a suggestion of how to do a back-linked stitch, which is much less visible.

Back-linked crochet stitches - Tutorial

Furthermore it gives you a fantastic texture and drape. This is truly useful for scarves and other things you wear.

Back-Linked Stitches

When doing 'ordinary' linked stitches, you get a visible link at the front of the stitch. Sometimes you don't want that. In that case, I've work out a method, where you use a bump on the back of a stitch to link into.

Back-linked crochet stitches
Back linked stitches. Almost invisible at the front.
See the back side below.

Notice. You can link double crochet (dc) and taller stitches (US terms), though you can also link a dc to a half double crochet stitch (hdc), if the hdc is made first.

Tutorial

Like linked stitches, back-linked stitches are also made by replacing the normal yarn-over (YO) with a link. In back-linked stitches you insert the hook into a bump on the back of the last stitch. Look at the back of a chain stitch. There is a bump there, we will use.

Taller stitches usually start with 2 or more YO. Each of these YOs should be replaced with a insert-into-the-back-bump-yo-pull-up-loop.

Foundation. Make a row of 8 chains. Turn with 2 chains. Be careful NOT to tighten the last chain and the loop on the hook too much or you cannot insert the hook in the bump.

Note. The 2nd chain from the hook will be the 'footer' of this 2-chain turn stitch (for regular linked stitches the 3rd chain is the 'footer'.)

  1. Make the first back-linked stitch by turning your work, so you can see the back of your last chain. Find the first back bump close to the hook and insert the hook here. YO and pull up a loop.
Back-linked crochet stitches - img 1

  1. Skip one chain and insert the hook in the next stitch/chain as you would do with a normal dc. YO and pull up a loop.
Back-linked crochet stitches - img 2

  1. Finalize the dc as usual. *YO and pull through two loops.* Repeat this.
Back-linked crochet stitches - img 3

Back-linked crochet stitches - img 3b

  1. The back-linked stitch is done. If you count the 2-chain-stitch, there are now 2 stitches in the row.

Back-linked crochet stitches - img 4


All the following stitches look alike. Turn your work a little, so you can see and find the back bump closest to the hook.

  1. Insert the hook in the back bump. YO and pull up a loop.
Back-linked crochet stitches - img 5

  1. Insert the hook it the top of the previous row or chain (as usual). YO and pull up a loop.
Back-linked crochet stitches - img 6

  1. Finalize your stitch as usual. *YO, pull through two loops* until there is only one loop left on the hook.
Back-linked crochet stitches - img 7

Back-linked crochet stitches - img 7b

Turning

Turn with 2 chains. Do not tighten the last chain too much.The first linked stitch can be difficult, if you tighten your chains too much.

  1. Find the back bump of your last chain and insert the hook here. YO and pull up a loop.
Back-linked crochet stitches - turning 1

  1. Insert your hook into the next stitch of the previous row (as usual). YO and pull up a loop.
Back-linked crochet stitches - turning 2


Finalize the stitch as usual with *YO and pull through two loops* twice. Repeat 5)-7) all across for a full row of linked stitches.

Two rows of back-linked stitches
Two rows of back-linked stitches.

Video

I know some of you like a video. So I hope this is useful for you. Remember to click like, if you like it and I would also love if you subscribe to more on youtube.


The Geeky Note

When I had worked with linked stitches for a short while, something hit me. If you have tried linked stitches with taller stitches and if you know Tunisian crochet by heart, maybe you have seen it too. To me, linked stitches are similar to short rows of Tunisian crochet stitches.

Ordinary linked stitches are Tunisian simple stitches and the back-linked version is similar to the Tunisian top stitch - which btw, is one of my favorite Tunisian stitches due to its drape and how it can be used for a flexible rib.

What Name to Use?

So, maybe we could just call linked stitches for short rows of Tunisian simple stitch and the back-linked stitches for short rows of Tunisian top stitch?

Well... my problem is that I need to add a disclaimer here. I believe some has argued that linked stitches are NOT Tunisian stitches. I don't see any difference, but now I'm not sure, if we should call them one thing or another - or if the purpose and way of thinking of them can justify two different names.

Funny world, right?
Share
Pin
No comments
Older Posts

Newsletter

Don't miss the next tip or pattern
from StoneGnome.

Find StoneGnome at

  • Ravelry
  • LoveCrafts
  • Littlebugz

  • Facebook
  • YouTube
  • Pinterest
  • Instagram

Loop Legends

  • From Image to Crochet Chart
  • How to Find Your Gauge
  • Mini Neck Warmer
  • Guide: Splitting Yarn
  • You Don't Need a Tunisian Crochet Hook
  • Crochet (Sea)Grass and Succulents
  • Chain Mail Shirt
  • Minor Felting Mishaps

My favorite Links

  • StoneGnome Pattern Shop
  • StoneGnome at Ravelry
  • StoneGnome at LoveCrafts
  • Crochet Kim
  • Annie's Catalog
  • Designing Vashti
  • Stitch Fiddle
  • Stitchboard · Pattern Wizard
  • Free Vintage Crochet

Labels

Bornholm Split Crochet advanced amigurumi basic beads christmas crochet crochetChart easter edge felting filetcrochet freePattern guide hat miteredCorner ornament paidPattern pattern ribbing shoes slipStitch spiral stitchPattern topStitch tunisian tutorial

All Crocheticles

  • ▼  2025 (2)
    • ▼  February (1)
      • Waistcoat Stitch Colorwork
    • ►  January (1)
  • ►  2024 (6)
    • ►  December (1)
    • ►  November (1)
    • ►  October (2)
    • ►  April (1)
    • ►  March (1)
  • ►  2023 (7)
    • ►  September (2)
    • ►  June (2)
    • ►  March (1)
    • ►  February (1)
    • ►  January (1)
  • ►  2022 (3)
    • ►  November (1)
    • ►  April (1)
    • ►  February (1)
  • ►  2021 (9)
    • ►  November (1)
    • ►  October (3)
    • ►  September (2)
    • ►  May (1)
    • ►  March (1)
    • ►  February (1)
  • ►  2020 (15)
    • ►  December (1)
    • ►  November (1)
    • ►  October (2)
    • ►  May (2)
    • ►  March (2)
    • ►  February (3)
    • ►  January (4)
  • ►  2019 (8)
    • ►  December (2)
    • ►  October (2)
    • ►  September (1)
    • ►  May (1)
    • ►  March (1)
    • ►  February (1)
  • ►  2018 (15)
    • ►  June (3)
    • ►  May (1)
    • ►  April (4)
    • ►  March (1)
    • ►  February (4)
    • ►  January (2)
  • ►  2017 (48)
    • ►  December (4)
    • ►  November (3)
    • ►  October (2)
    • ►  September (5)
    • ►  August (5)
    • ►  July (3)
    • ►  June (5)
    • ►  May (3)
    • ►  April (4)
    • ►  March (5)
    • ►  February (5)
    • ►  January (4)
  • ►  2016 (25)
    • ►  December (5)
    • ►  November (7)
    • ►  October (5)
    • ►  September (4)
    • ►  August (4)
FOLLOW STONEGNOME @INSTAGRAM

    Ⓒ StoneGnome · Created with · by BeautyTemplates