StoneGnome

Crochet Love · Crochet & Tunisian Crochet · Studying, Developing, and Teaching Crochet Techniques

  • Home/Blog
  • Crochet
    • Basic Skills
    • Beyond the Basics
    • Advanced Crochet
    • Stitches and Stitch Patterns
  • Tunisian Crochet
    • Basic Tunisian Skills
    • Beyond the Basics
    • Advanced Tunisian Skills
    • Stitches and Stitch Patterns
  • Tutorials n Guides
    • Guides
    • Step by Step Tutorials
    • Stitches and Stitch Patterns
  • Patterns
    • Free Patterns
    • Paid Patterns
  • Themes
    • Felting
    • Hats
    • Ribbing
    • Split Crochet (NEW)
    • Slip Stitches (ss)
    • Top Stitch
    • Amigurumi
    • Hearts
    • Ornaments
  • Other
  • About
    • Contact Me
    • Copyright and Selling
    • Personal Data, Cookies and Marketing
Here is a beautiful open Valentine's Heart for you. It is a free pattern.

Valentines Heart - crochet pattern

Use it for decoration or as a bookmark.

Share
Tweet
Pin
No comments
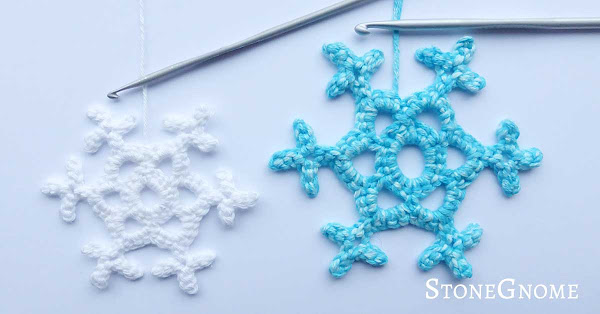
Here is a free snowflake pattern for you, that can bring bright snow into your life.

Free Crochet Snowflake Pattern

Use it for Christmas or use it as decoration, when other Christmas decorations are put away and everything feels a bit empty and dark.

Share
Tweet
Pin
1 comments
In my last blog post, I showed you how to link stitches. I also have a suggestion of how to do a back-linked stitch, which is much less visible.

Back-linked crochet stitches - Tutorial

Furthermore it gives you a fantastic texture and drape. This is truly useful for scarves and other things you wear.

Back-Linked Stitches

When doing 'ordinary' linked stitches, you get a visible link at the front of the stitch. Sometimes you don't want that. In that case, I've work out a method, where you use a bump on the back of a stitch to link into.

Back-linked crochet stitches
Back linked stitches. Almost invisible at the front.
See the back side below.

Notice. You can link double crochet (dc) and taller stitches (US terms), though you can also link a dc to a half double crochet stitch (hdc), if the hdc is made first.

Tutorial

Like linked stitches, back-linked stitches are also made by replacing the normal yarn-over (YO) with a link. In back-linked stitches you insert the hook into a bump on the back of the last stitch. Look at the back of a chain stitch. There is a bump there, we will use.

Taller stitches usually start with 2 or more YO. Each of these YOs should be replaced with a insert-into-the-back-bump-yo-pull-up-loop.

Foundation. Make a row of 8 chains. Turn with 2 chains. Be careful NOT to tighten the last chain and the loop on the hook too much or you cannot insert the hook in the bump.

Note. The 2nd chain from the hook will be the 'footer' of this 2-chain turn stitch (for regular linked stitches the 3rd chain is the 'footer'.)

  1. Make the first back-linked stitch by turning your work, so you can see the back of your last chain. Find the first back bump close to the hook and insert the hook here. YO and pull up a loop.
Back-linked crochet stitches - img 1

  1. Skip one chain and insert the hook in the next stitch/chain as you would do with a normal dc. YO and pull up a loop.
Back-linked crochet stitches - img 2

  1. Finalize the dc as usual. *YO and pull through two loops.* Repeat this.
Back-linked crochet stitches - img 3

Back-linked crochet stitches - img 3b

  1. The back-linked stitch is done. If you count the 2-chain-stitch, there are now 2 stitches in the row.

Back-linked crochet stitches - img 4


All the following stitches look alike. Turn your work a little, so you can see and find the back bump closest to the hook.

  1. Insert the hook in the back bump. YO and pull up a loop.
Back-linked crochet stitches - img 5

  1. Insert the hook it the top of the previous row or chain (as usual). YO and pull up a loop.
Back-linked crochet stitches - img 6

  1. Finalize your stitch as usual. *YO, pull through two loops* until there is only one loop left on the hook.
Back-linked crochet stitches - img 7

Back-linked crochet stitches - img 7b

Turning

Turn with 2 chains. Do not tighten the last chain too much.The first linked stitch can be difficult, if you tighten your chains too much.

  1. Find the back bump of your last chain and insert the hook here. YO and pull up a loop.
Back-linked crochet stitches - turning 1

  1. Insert your hook into the next stitch of the previous row (as usual). YO and pull up a loop.
Back-linked crochet stitches - turning 2


Finalize the stitch as usual with *YO and pull through two loops* twice. Repeat 5)-7) all across for a full row of linked stitches.

Two rows of back-linked stitches
Two rows of back-linked stitches.

Video

I know some of you like a video. So I hope this is useful for you. Remember to click like, if you like it and I would also love if you subscribe to more on youtube.


The Geeky Note

When I had worked with linked stitches for a short while, something hit me. If you have tried linked stitches with taller stitches and if you know Tunisian crochet by heart, maybe you have seen it too. To me, linked stitches are similar to short rows of Tunisian crochet stitches.

Ordinary linked stitches are Tunisian simple stitches and the back-linked version is similar to the Tunisian top stitch - which btw, is one of my favorite Tunisian stitches due to its drape and how it can be used for a flexible rib.

What Name to Use?

So, maybe we could just call linked stitches for short rows of Tunisian simple stitch and the back-linked stitches for short rows of Tunisian top stitch?

Well... my problem is that I need to add a disclaimer here. I believe some has argued that linked stitches are NOT Tunisian stitches. I don't see any difference, but now I'm not sure, if we should call them one thing or another - or if the purpose and way of thinking of them can justify two different names.

Funny world, right?


Share
Tweet
Pin
No comments
I'll show you how to link crochet stitches and eliminate the slit between them.

Tutorial: How to link crochet stitches

It is very useful, if you want to use a tall stitch for an amigurumi figure or just want another stitch in your stitch collection.

Share
Tweet
Pin
No comments
Christmas gets closer every day. All full of love and (Xmas) hearts. Here is a free heart pattern for you.

Crochet Filet Heart Table Topper

I'll guide you at the beginning of the diagram as well as at the parts, when new things happen. So even if you are a newbie, you should be able to finalize this.

Share
Tweet
Pin
No comments
The Picky Pillow Pattern now includes TWO pillows in the exquisite Twisted Stitch pattern.

Picky Pillows - now there are TWO of them

If you bought the pattern already, remember to get the updated version. If you haven't bought it yet, go get the pattern for the two beautiful pillows.

Share
Tweet
Pin
No comments
Picky Pillow. Supports you when you crochet or knit.
The Picky Pillow pattern is now available. The pillow is designed to support you when you crochet or knit - or just want to relax.

Picky Pillow. Supports you when you crochet or knit.

The Tunisian twisted stitch pattern is used and a full photo tutorial for this is included in the pattern, so all you have to know in advance, is the Tunisian simple stitch and how to do regular single crochet.

NOTICE

For a limited time only, the pattern is available at an INTRODUCTION PRICE.

...AND if you buy it now, then make sure you are logged in, as you should then automatically get access to updates. You might be happy about that later on... hint, hint.

Buy the Pattern

The pattern is available in English (US terms) from Ravelry and LoveCrafts. It is also available in Danish, where it is called 'Pernitten Pude'. Find the Danish version at LoveCrafts and Ravelry.

About the Pattern

As usual you get a pattern with lots of photos and guidance helping you out.

Cro-hook

The main part of the pillow is worked in rows back and forward. You will need a cro-hook / double-ended hook for this. With or without cable. This also means that the length of your cro-hook doesn't matter much, as you don't have to do a full forward pass before you start a return pass.

The Tunisian Twisted Stitch Pattern

Inner Pillow

In the pattern I suggest using an inner pillow. This is optional as the stitches are tight enough to hold the filling in. Personally I think and inner pillow gives you a more expensive-looking pillow, and it will of course also help the pillow stay in shape. So instructions for making an inner pillow are included. And it is NOT difficult to make one.

Adjustable

The pattern also includes instructions for adjusting the pillow size any way you want. So it can fit any inner pillow you have already or whatever you decide you need.

Testers

It has been quite a journey to make this pattern. No less than three testers have helped me out and once again, I'm surprised how much testing can improve a pattern. Thank you to Marjolein, Ewa, and Karen!

Selling Finished Products

Yes, you can do that. No problem! Read more in the menu: About > Copyright, Selling and Affiliate Links

Picky Pillow.

If you have any questions, just ask. You can find me here, on Ravelry or Facebook.


Share
Tweet
Pin
No comments
Some Tunisian patterns are easy to do, when you work in rounds, while doing rows are considered impossible, or something that requires sewing in a lot of ends.


It's just not at all impossible. Nor do you need to cut the yarn and sew in ends all the time.

Share
Tweet
Pin
No comments
Add Colors to the Tunisian Twisted Stitch Pattern
Wow! The rarely used twisted stitch pattern looks fantastic using more colors! I didn't even realize that until Chanette asked for more colors...

Add Colors to the Tunisian Twisted Stitch Pattern

I'll show you, how you add more color to this stitch pattern row by row.
Share
Tweet
Pin
2 comments
Here is a nice and easy-to-do Tunisian stitch pattern for you. It is one of my favorites and I rarely see other using it, which is a shame. Try it, you might love it too.

Twisted Stitch Pattern

I also have a little workaround for you, that helps you close gaps in the left side of your work

Share
Tweet
Pin
No comments
Tunisian Crochet. Knit Stitch. Left side increase.
Learn how to make a nice Tunisian knit stitch increase at the left side (or right side, if you are left-handed).

Tunisian Crochet. Knit Stitch. Left side increase.

I'm experimenting with mitered corners and have developed a way to do the left side increase without it being too tight and knotted.

Share
Tweet
Pin
1 comments
Crochet: Bottle Decoration
Make a nice decoration for your bottle of water. Use it as nice touch or for more practical reasons.

Crochet: Bottle Decoration

Everybody brings a bottle of water at the fitness center or at a field trip. Some of the bottles look very much alike, and occasionally it can be difficult to find the right one.

Here is a pattern for a bottle decoration, that makes your bottle unique.

Share
Tweet
Pin
No comments
Say hello to another happy member of the baby toy family. The Smiley Cloud.


As a gift to everyone on the newsletter list and following on Facebook, The crochet pattern is FREE for a few days - but on Ravelry only! Use the coupon code FREECLOUD.

Share
Tweet
Pin
No comments
Crochet slip stitch ribbing boot cuffs
Need boot cuffs - or just want to practice slip stitches? Use the boot cuffs as decoration, to stay warm or to give the boots a nice soft top.

Crochet slip stitch ribbing boot cuffs

Share
Tweet
Pin
No comments
A new pattern is out. A cute little Smiley Moon.


The Smiley Moon has actually existed for quite some time. Now it exists as a written pattern too. Find it at  Ravelry or as a package with 3 amigurumi patterns at LoveCrafts.

Share
Tweet
Pin
2 comments
Crocheted Sea Grass and Succulents
Bymami has this exquisite pattern package with 5 different succulents. I wanted to try one with variegated yarn, and then I made a tuft of (sea)grass as well to create a sea theme. This might be a good way of spending leftover yarn.

Crocheted Sea Grass and Succulents

Get links and patterns here.

Share
Tweet
Pin
No comments
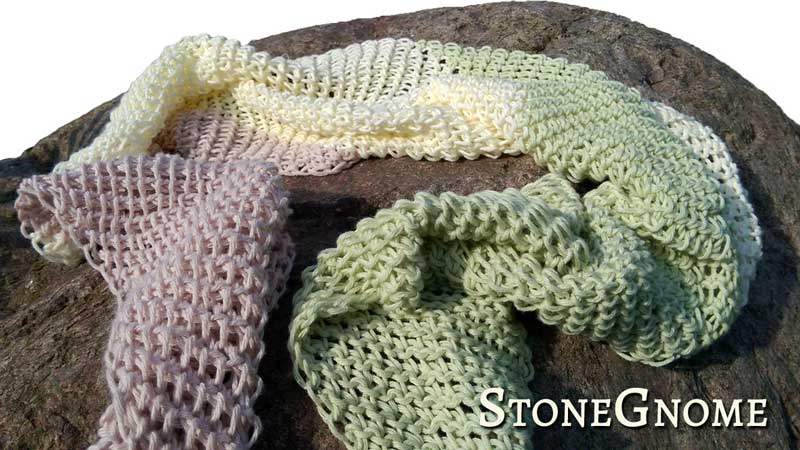
Most of us use it frequently. Just a little here and there. Some consider it more of a technique than a stitch. But it IS a stitch.


We tend to forget that this stitch is very versatile and can be used for much more. It can give your work a dense - though soft and drapable - fabric, you can use it for decoration, and it can be used for a stretchy ribbing.

Have you figured out by now, what stitch I'm referring to?
Share
Tweet
Pin
6 comments
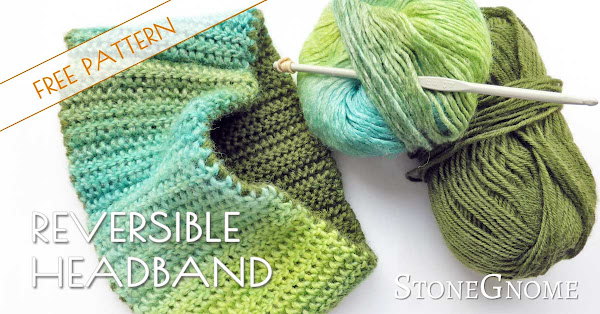
When it is too warm to wear a hat, but your ears get cold, then a headband might be what you need. Here is a free pattern for you.


Share
Tweet
Pin
No comments
Newer Posts
Older Posts

Newsletter

Don't miss the next tip or pattern
from StoneGnome.

Find StoneGnome at

  • Ravelry
  • LoveCrafts
  • Littlebugz

  • Facebook
  • YouTube
  • Pinterest
  • Instagram

recent posts

Popular Posts

  • Tunisian Crochet Cast On
  • Tunisian Single Hook Cast On
  • Free Snowflake Pattern

Labels

advanced amigurumi basic beads Bornholm christmas crochet crochetChart easter edge felting filetcrochet freePattern guide hat miteredCorner ornament paidPattern pattern ribbing shoes slipStitch spiral Split Crochet stitchPattern topStitch tunisian tutorial

My favorite Links

  • My designs at LoveCrafts
  • My designs at Ravelry
  • My design page at Littlebugz.dk
  • Annie's Catalog
  • Designing Vashti
  • Crochet Kim
  • Free Vintage Crochet
  • Stitch Fiddle
  • Stitchboard · Pattern Wizard
FOLLOW STONEGNOME @INSTAGRAM

Ⓒ StoneGnome · Created with · by BeautyTemplates