StoneGnome

Crochet Love · Crochet & Tunisian Crochet · Studying, Developing, and Teaching Crochet Techniques

  • Home/Blog
  • Crochet
    • Basic Skills
    • Beyond the Basics
    • Advanced Crochet
    • Stitches and Stitch Patterns
  • Tunisian Crochet
    • Basic Tunisian Skills
    • Beyond the Basics
    • Advanced Tunisian Skills
    • Stitches and Stitch Patterns
  • Tutorials n Guides
    • Guides
    • Step by Step Tutorials
    • Stitches and Stitch Patterns
  • Patterns
    • Pattern Posts
    • StoneGnome Shop ♥
    • Visit Ravelry
    • Visit LoveCrafts
  • Themes
    • Slip Stitches (ss)
    • Felting
    • Hats
    • Ribbing
    • Waistcoat stitch Love
    • Top Stitch
    • Amigurumi
    • Small Hearts
    • Ornaments
    • Seasonal Themes n more
  • About
    • Contact Me
    • Copyright and Selling
    • Personal Data & Privacy

Most of us cannot crochet with both hands. Though sometimes it would be useful to be able to.

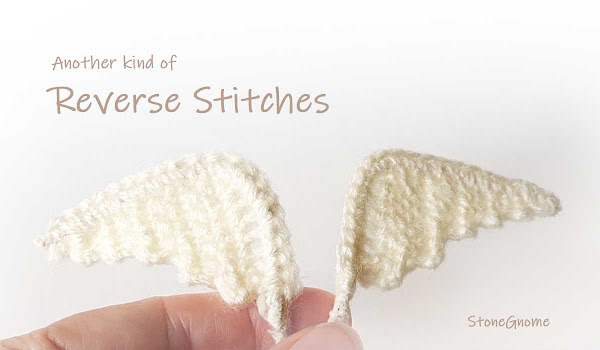
Another kind of reverse stitches

When I made wings for a pumpkin (yes, for a pumpkin, a Halloween pumpkin), I wanted the reverse side of the second wing to look like the front side. Including the small ridges. 

Updated September 2023

It would have been great if I could have worked the second wing with my left hand. Then it would truly be 'mirrored' versions of the same item.

There is an alternative. In Tunisian crochet, there is something called 'reverse stitches'. Reverse stitches in the world of regular crochet are usually related to stitches like the 'crab stitch', where you crochet in the opposite direction (right-handed work from left to right).

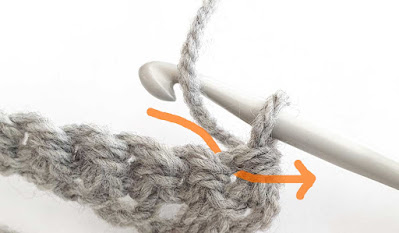
However, with Tunisian crochet, the reverse stitches are not made in a different direction but on the reverse side of the work.

All you do is: 

  • Position the yarn in front of the hook and your work. 
  • Then, insert the hook from BEHIND the work into the regular stitch. 
  • Yarn-over, pull up a loop and complete the stitch as usual.

Regular crochet - reverse stitches
This is really all there is to it, and it can be done with regular crochet too.

Video

If you prefer a video to see how it can be done, then I made one for you here.


Try it. Practicing reverse stitches is just like learning any other new stitch. It might seem uncomfortable in the beginning, but then it gets easier and easier until it feels like a piece of cake.
:)
Share
Pin
No comments

It must be Father's Day month as most of the world celebrates Father's Day sometime during June. 

Crochet patterns

To honor all Fathers, there is a special offer for you - for a limited time only.  

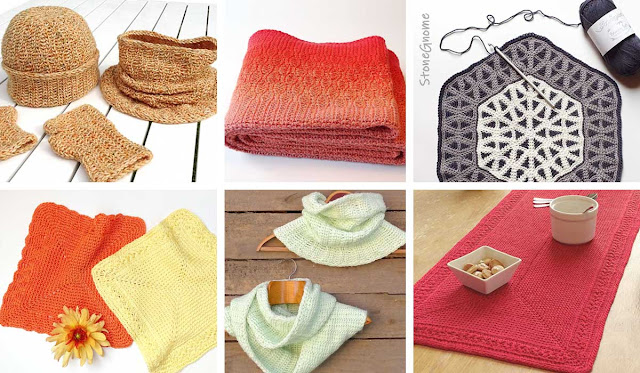
All the StoneGnome patterns made of little crocheted hearts - aka waistcoat stitches - are free or available with a 30% discount.

What to Choose

You can make a pillow from the mandala pattern or crochet something for your father to wear that can keep him warm during winter. Gloves, ear warmer, a beanie, or a cowl. 


The musician Brian Margell recently crocheted an infinity scarf for his wife. See his photos on Instagram @margellmusic 


The Patterns

All waistcoat stitch patterns can be found from the menu Themes > Waistcoat Stitch LOVE.

Paid patterns can be purchased from Ravelry or at the StoneGnome shop.

Use the code DAD2023 to get the discount.
(At Ravelry or at the Stonegnome shop only).

The code expires on June 14th (UTC).


crochet patterns using the waistcoat stitch
Share
Pin
No comments
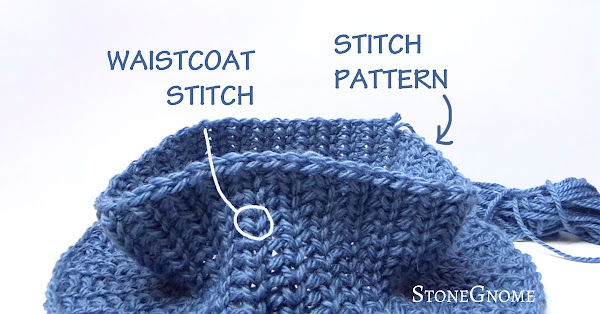
The waistcoat stitch is a lovely little thing and you can make beautiful yet easy and fast-worked stitch patterns with it. Let me show you.

Waistcoat stitch and stitch pattern tutorial

Share
Pin
No comments
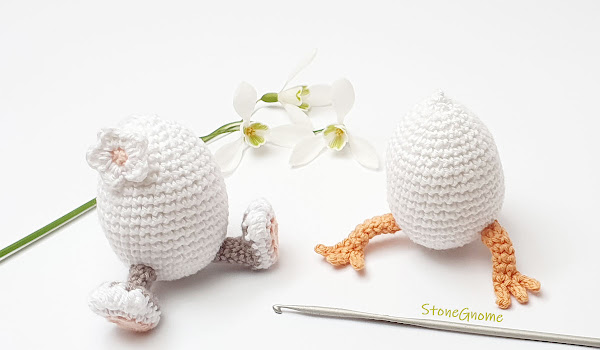
Bunny Egg usually hangs out around Easter enjoying the company of Junior Egg. 

Crochet Easter Bunny Egg and Junior Egg

Hence, the pattern for Bunny Egg has been updated and now includes Junior Egg. The two of them love that ♥ 

The 2-in-1 pattern is available at Ravelry, LoveCrafts or you can purchase it in the StoneGnome Payhip store. It's available in English and Danish.

If you want to try Junior Egg for FREE, then you'll find Junior right here.

Updated. This post has been updated as of March 2023

Skill level

The pattern is written for crocheters that are familiar with amigurumi. Difficulty level is intermediate/advanced. There are a few special stitches like BLO and Puff stitches. They are slightly modified, but - of course - explained.

Junior is the easiest one to make, while you might need a little peace, glasses and good light when you make the legs for Bunny Egg.

Size and Yarn

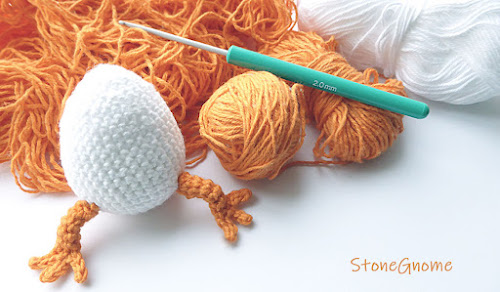
The Easter Egg will be around 6.5cm tall (2.6") if you work with the recommended hook size 2-2.5mm (US 0-B1 or steel 4, UK 14-13).

Use regular cotton yarn for amigurumi.

It could be something like Scheepjes Cotton 8 or similar.
Colors could be:
  • 502 white
  • 710 grey
  • 649 soft coral (or 715 nude).
  • 639 Burned Orange.
Bunny Egg and Junior Egg


I tried Scheepjes Organicon (Ravelry link), which was soft and lovely to work with. Even a bit thick and fluffy in the right way. Totally recommend this for a luxury project and if the egg is for decoration purposes only.

However, if you plan to use the Easter Egg as a toy, the yarn might get a little worn out faster than other yarn. At least that is what I experienced when I used it for samples and had to frog it several times.

More versions

Margie helped test and proofread the original patterns. Check out her latest colorful Junior Eggs from 2023 or her very, very cute Bunny Egg on Instagram. 

Thank you Margie for being such a patient and positive tester and proofreader.

Enjoy the pattern and Easter!

Related blog post: Junior Egg
Share
Pin
No comments
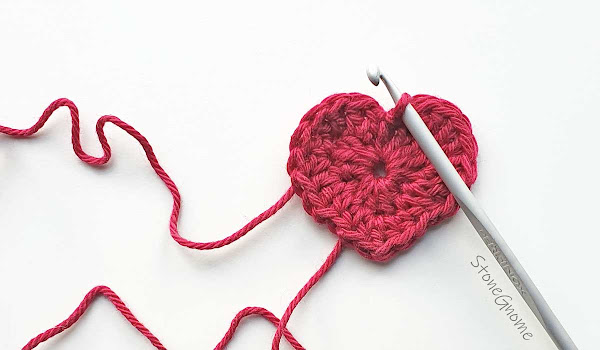
This heart was made for#WorldHeartDay (sep 2022), but it also works perfectly for Valentines Day.

World Heart Day - free crochet pattern

Use the heart to remind you of what is important in your life and what makes you happy. ❤ 

Written Pattern

Use any yarn and hook that works for you. I used Scheepjes Catona and hook 3.5 mm (US E/4- UK 9)

Abbreviations
(US terms)
ss    - slip stitch
ch    - chain
sc    - single crochet
hdc  - half double crochet
dc    - double crochet
[ ]    - all in the same stitch

Make a Magic Ring. Work 1st round in the Magic Ring.

Round 1 
Ch 1, 3 dc, 2 sc, 1 hdc, 1 dc, 1 hdc, 2sc, 3 dc, ch1 and 1 sc in the ring.
Pull the magic ring semi-tight.

Round 2 
sc in the chain, (2dc in the next st) x 4, 
1 hdc in the sc, 1 hdc in the hdc,
[1 hdc, 1 dc, 1 hdc] in the dc, 
1 hdc in the hdc, 1hdc in the sc, 
(2dc in the next st) x 4, 
1 sc in the chain, 1 ss in the sc.

Pull the magic ring as tight as possible (don't break the yarn). Cut the yarn and pull at the last loop on the hook till the strand is free. Pull tight and weave in ends.

Pattern Chart

If you prefer a chart, then see below. I will post these on Instagram too. 

Round 1 starts at the red dotted line. Round 2 starts at the blue dotted line.

❤ StoneGnome


If you want more hearts, then check out my other small heart posts. I love hearts ❤
Share
Pin
2 comments
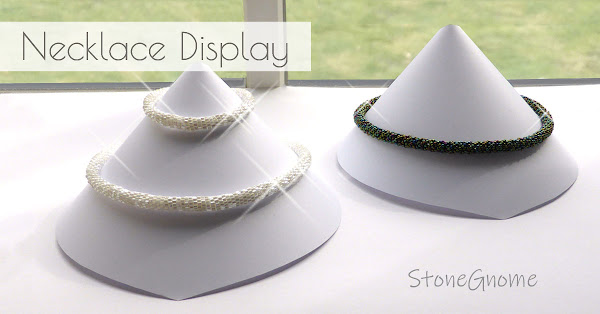
Make an angel display for a crocheted necklace or a beaded crochet necklace. The display can be used for selling items at a market, if you attend an exhibition, or maybe for a special gift. 
Necklace Display - for Beaded Crochet Necklaces
I made the display in 2017 for an exhibition I was attending with other textile and yarn freaks; weavers, filters, knitters, and crocheters. I wanted to present my crocheted necklaces in a nice way.

UPDATE: Due to requests, this writing and the templates below have been updated in January 2023.

First, I found a template (and tutorial) at Georgia P Designs. There are cones for bracelets, a cone for a necklace, and a flat-back necklace display stand.

However, one of my necklaces comes with a tight bracelet. I wanted the necklace and the bracelet to be on the same display, which required the bottom of the template to be rather wide compared to the top of the template. Otherwise, the distance between the two would be too big.

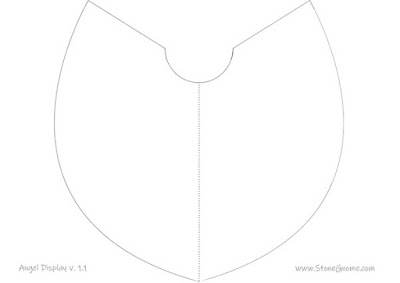
After playing around for a little while, I ended up with a display shaped like angel wings. 
The files are available from my google drive. You can get a full-size copy from the links.

  • Angel Display template - as JPG
  • Angel Display template - as PDF
Make the printed side the back of your cone. The print on the template files is rather pale, so it doesn't show through the paper.

If you can't print close to the edges, you can shrink it a bit (your printer dialog should help you with this) - OR you can ignore the missing print at the margins. It should be fairly easy to guess where to cut. Use the dotted line as a guide for the front tip.

Necklace Display - Angel Wings

Carefully fold it, so the back flaps overlap with about 1cm (0.4in), and glue the part that overlaps.

I've used heavy 190g A4 paper with a very smooth surface, so I sewed a couple of stitches on the back to make the necklaces and the bracelet stay in place. I've seen others cover the display with wallpaper or likewise and I'm guessing a rougher surface will prevent the necklaces from slipping.

The Exhibition

The keywords for the exhibition in 2017 were to show some of the many different things you can do with yarn and textiles. It used to be an annual recurring event in Gudhjem Museum (Denmark, Bornholm). The last years have been hard on exhibitions due to lockdowns and restrictions, but hopefully, there will be more yarn and textile exhibitions in the future. 

I enjoyed the beaded crochet work a lot, so I might also need the displays again one day.

Read more: Beaded Crochet Rope Necklace

Links to Display Ideas

Here are a couple of other display ideas and templates in case you need something special.
  • Georgia P. Designs templates and tutorial
  • A Plywood Jewelry Pyramid tutorial can be found at Collectivegen.com (former 'A Pair & Spare'), which also posted templates for a couple of Wooden Jewellery Holders in May 2022.
  • 3 other DIY Necklace displays are present at Tutorial De Artisana (eng: Craft Tutorial)
Share
Pin
No comments
It's time for Christmas Crocheting.
Christmas Ornament Patterns

Here are links to some free Christmas crochet patterns to you from StoneGnome.

Little ornaments are great to crochet and hang in the window or on a Christmas tree. They are also pretty fast to make, which is excellent if you have busy days or just need something easy to make.

I love the crochet snowflakes. They are small, bright, and last all winter as window decorations. And btw, there are two different versions. The second snowflake might have been hiding, so use the link below :)

I also love hearts; you can use them for more yearly occasions. And then of course the pretty stars. Very easy and relaxing to make.
  • World Heart Day
  • Snowflake #1
  • Snowflake #2
  • A Little Christmas Heart
  • Sibling Stars
  • Double Heart

Christmas Crochet Ideas

If you get into it and suddenly have a lot of crochet beauties, then use the crocheted items as part of your Christmas wrapping for a more personalized look and feel on the presents. Or make a tree branch mobile by hanging ornaments on a pretty curly branch from the garden.

Happy Christmas Crocheting!
Share
Pin
No comments
Crochet your own decorated eggs. Use a basic egg and change colors as you wish for nicely decorated eggs.

crochet Easter eggs

If you use waistcoat stitches for your egg you get different options. Like small, heart-shaped dots ♥ 

Share
Pin
No comments
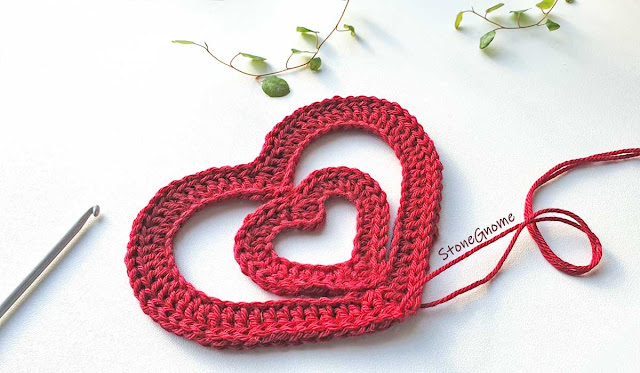
This adorable double heart is double love. Give it to someone extra special or make it for your own joy.

Double Heart - Crochet Pattern

The heart ornament is made in one piece, so there is no sewing the parts together in the end.

Share
Pin
No comments
Newer Posts
Older Posts

Newsletter

Don't miss the next tip or pattern
from StoneGnome.

Find StoneGnome at

  • Ravelry
  • LoveCrafts
  • Littlebugz

  • Facebook
  • YouTube
  • Pinterest
  • Instagram

Loop Legends

  • From Image to Crochet Chart
  • How to Find Your Gauge
  • Mini Neck Warmer
  • You Don't Need a Tunisian Crochet Hook
  • Guide: Splitting Yarn
  • Crochet (Sea)Grass and Succulents
  • Chain Mail Shirt
  • Minor Felting Mishaps

My favorite Links

  • StoneGnome Pattern Shop
  • StoneGnome at Ravelry
  • StoneGnome at LoveCrafts
  • Crochet Kim
  • Annie's Catalog
  • Designing Vashti
  • Stitch Fiddle
  • Stitchboard · Pattern Wizard
  • Free Vintage Crochet

Labels

Bornholm Split Crochet advanced amigurumi basic beads christmas crochet crochetChart easter edge felting filetcrochet freePattern guide hat miteredCorner ornament paidPattern pattern ribbing shoes slipStitch spiral stitchPattern topStitch tunisian tutorial

All Crocheticles

  • ▼  2025 (2)
    • ▼  February (1)
      • Waistcoat Stitch Colorwork
    • ►  January (1)
  • ►  2024 (6)
    • ►  December (1)
    • ►  November (1)
    • ►  October (2)
    • ►  April (1)
    • ►  March (1)
  • ►  2023 (7)
    • ►  September (2)
    • ►  June (2)
    • ►  March (1)
    • ►  February (1)
    • ►  January (1)
  • ►  2022 (3)
    • ►  November (1)
    • ►  April (1)
    • ►  February (1)
  • ►  2021 (9)
    • ►  November (1)
    • ►  October (3)
    • ►  September (2)
    • ►  May (1)
    • ►  March (1)
    • ►  February (1)
  • ►  2020 (15)
    • ►  December (1)
    • ►  November (1)
    • ►  October (2)
    • ►  May (2)
    • ►  March (2)
    • ►  February (3)
    • ►  January (4)
  • ►  2019 (8)
    • ►  December (2)
    • ►  October (2)
    • ►  September (1)
    • ►  May (1)
    • ►  March (1)
    • ►  February (1)
  • ►  2018 (15)
    • ►  June (3)
    • ►  May (1)
    • ►  April (4)
    • ►  March (1)
    • ►  February (4)
    • ►  January (2)
  • ►  2017 (48)
    • ►  December (4)
    • ►  November (3)
    • ►  October (2)
    • ►  September (5)
    • ►  August (5)
    • ►  July (3)
    • ►  June (5)
    • ►  May (3)
    • ►  April (4)
    • ►  March (5)
    • ►  February (5)
    • ►  January (4)
  • ►  2016 (25)
    • ►  December (5)
    • ►  November (7)
    • ►  October (5)
    • ►  September (4)
    • ►  August (4)
FOLLOW STONEGNOME @INSTAGRAM

    Ⓒ StoneGnome · Created with · by BeautyTemplates