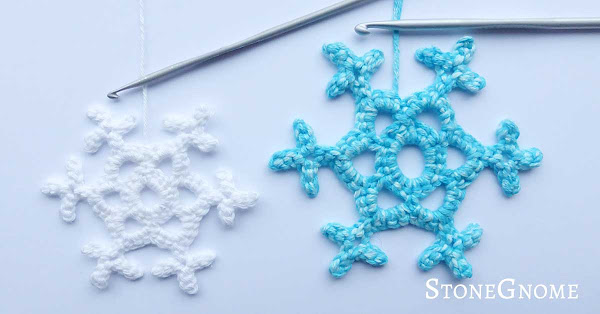
Here is a free snowflake pattern for you, that can bring bright snow into your life.
Use it for Christmas or use it as decoration, when other Christmas decorations are put away and everything feels a bit empty and dark.
UPDATE: This blog post has been updated as of December 2018.
Downloadable versions of this pattern can be found at Ravelry and LoveCrafts.
It's available in English and Danish.
Downloadable versions of this pattern can be found at Ravelry and LoveCrafts.
It's available in English and Danish.
Size and Yarn
My first snowflake was 7 cm wide (2.8in). Using- 3mm hook (US 2½-C/D, UK 11)
- Regular 100% cotton yarn (170m/50gram ~ 180y/1.76oz).
- 4mm hook (US 6-G, UK 8)
- Himalaya Denim. 100% cotton yarn (140m/50gr ~ 153y/1.76oz).
The Pattern
The written pattern should be beginner-friendly. I've added a few images to help you see if your progress is similar to mine.Abbreviations
ch = chainsc = single crochet
slst = slip stitch
** = repeat instructions within ** as directed
First Rounds:
- Ch 6, join with a slst to make a ring.
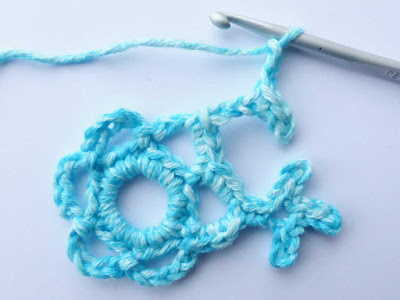
Crochet over the loose end in the next round to save yourself from sewing it in later. - 18 sc around the ring, join with a slst. (img 1)
Push the stitches a little, so they all fit in around the ring. - Chain Spaces. *Chain 5, skip 2 sts in the ring, 1 slst in the next stitch.*
Repeat all around = 6 chain spaces around the ring. (img 2)
Spikes
Important! When you slip stitch into a chain stitch, hook into the back loop only.- 3 sc around the next chain space.
-
Begin a spike. Ch 6, slst in the 2nd st from the hook,
1 slst in the next stitch,
1 slst in the next stitch. -
Mini spike. Ch 3, slst in the 2nd st from the hook,
1 slst in the next stitch,
1 slst in the next stitch (Hook into a stitch already hooked into before). - Mini Spike. Repeat line 6.
- Finalize a spike. 1 slst in the next stitch,
1 slst in the next stitch. - 3 sc in the same chain space.
Fasten off with a slip stitch into the next stitch. Cut the yarn and pull it through the loop. Use the cut yarn end for hanging up the snowflake.
You are done crocheting! A quick crochet project this one, right?
Washing (Blocking)
I didn't have to stiffen my snowflakes. I just washed and placed them on a flat surface and pulled a little at the spikes, till I was happy about the shape. Once dry, the snowflakes were fixed and ready to hang up.
Show Me Your Snowflake
Once, you have done one, you can make minor alterations here and there to get other types of snowflakes. I'd love to see if you make the above or other versions. Tag me at Instagram with @stonegnomedesign or show me on facebook.And notice, that you are always more than welcome to share/sell any products you make from my patterns. For further information read about copyright and selling.
Snowflake on a Mountain - and at Home
January 2018: If you follow me on Instagram, you might already have guessed, that I've been on vacation with my family. We visited a mountain and there wasn't any snow, so I started a little snowflake up there. It might have been the first time, I've crocheted while being 1800 meter (~ 6000 feet) above sea level (if flying doesn't count).
We got home from vacation very late Monday and then woke up to snow outside. Hurray!


1 comments
Thank you for the free pattern <3 :)
ReplyDeleteI’d love to hear your thoughts! ❤️
If I don’t reply to a question here, feel free to reach out via the contact page :)