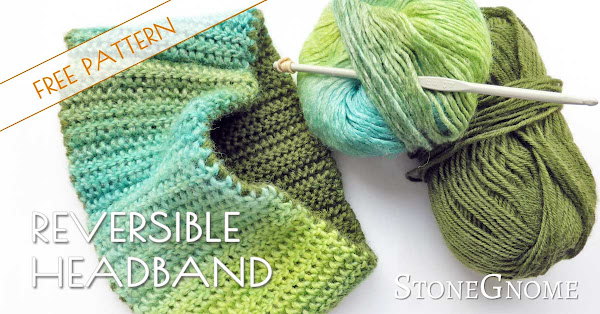
When it is too warm to wear a hat, but your ears get cold, then a headband might be what you need. Here is a free pattern for you.
I don't get many requests (besides from my son), but I did get this one. My mom (yes!) saw the Top Stitch Rib and asked, if it could be used for a headband. If so, she would really like one. She doesn't crochet. She used to be a diligent knitter, but I guess she is more into sewing these days. So I got her head size and found some leftover yarn from a scarf, I once made her.
The headband pattern can easily be altered to fit any head size or to fit any yarn. I made it double layered for maximum warmth and add some shelter from the wind. The photos might make it look heavy or dense, but when stretched, it feels good. However, if you want a sporty lighter version, you can stop working after the first layer is done, cut the yarn and tie off.

Following the directions here it should be around 10cm (4in) tall and 40cm (1.8in) in circumference when un-stretched. Height will shrink a little, when stretched.


Slip stitch it together, so it shapes a headband. Use the top bump of the current row (as you have till now) and use the bottom two loops from the foundation row. See the image.

Take a look at the first layer and find the hole between the outermost two vertical bars on each side. This is where you should insert your hook, when you stitch the two pieces together.
Alternatively you could do single crochet every time it says 'attach'. If you want that, then skip the attachment descriptions and head straight to the Second Layer Pattern.
Left Side Attachment
When you reach the left side of your work, you need to attach the row to the side of the first layer. Find a hole in a row in the first layer that looks suitable for attachment.

Before you attach here first time, make sure your single row is not twisted. Attach the first row like this:

Your next rows will be
When you reach the end, slip stitch the top and bottom together as you did with the first layer.
Cut the yarn and secure it.
Sew in ends. Make sure you do it along the ribs. If you do it across the ribs, you might prevent the headband from stretching.


UPDATE: If you would like this pattern as a PDF file, it is now available at Ravelry and Love Crochet.


I don't get many requests (besides from my son), but I did get this one. My mom (yes!) saw the Top Stitch Rib and asked, if it could be used for a headband. If so, she would really like one. She doesn't crochet. She used to be a diligent knitter, but I guess she is more into sewing these days. So I got her head size and found some leftover yarn from a scarf, I once made her.
The headband pattern can easily be altered to fit any head size or to fit any yarn. I made it double layered for maximum warmth and add some shelter from the wind. The photos might make it look heavy or dense, but when stretched, it feels good. However, if you want a sporty lighter version, you can stop working after the first layer is done, cut the yarn and tie off.

The Rib
If you are new to The Top Stitch Rib, this will be an excellent way for you to try it out. It is made by alternating two rows of Tunisian Top Stitches and two rows of Reversed Top Stitches. Whenever you switch from the top stitch to the reversed (and vice versa), you create kind of an angle between the two rows, that is an important part of the rib. For this to work properly, you need to use a relatively small hook, so the angles get well defined.Yarn
I prefer to use a wool yarn or wool blends, when I do the ribbing, as a lot of them has a nice sort-of-built-in-stretchy-tension.- about 25gr (1oz) dark green sock yarn.
- I used a wollen Sock yarn. Lane Cervinia. Fingering weight. 150m/50gr. (164y/1.76oz). 70% wool, 30% polyamide. Calling for a knitting needle size 2-2½ (US 0-2, UK 13-14)
- about 25gr (1oz) variegated green
- I used Katja, Aran Weight, 120m/50gr (131y/1.76oz). 70% wool, 30% soya bean fibres.
Calling for a knitting needle size 4 (US 6, UK 8)
Hook
4 mm (US G6, UK 8) or smaller. A regular hook with no handle will work (but maybe with a rubber band in the far end, to prevent the stitches from falling off the hook). Or use a Tunisian crochet hook. I crocheted my piece as tight as I could. If you crochet loose, choose a smaller hook.Size
This headband is made to fit a head size 58cm (22.9in). Head is measured, where the headband will be placed.Following the directions here it should be around 10cm (4in) tall and 40cm (1.8in) in circumference when un-stretched. Height will shrink a little, when stretched.


First Layer
- Chain 20
- Top Stitch all the way (Top Stitch tutorial here)
- Top Stitch all the way
- Reversed Top Stitch all the way (Reversed Top Stitch tutorial here)
- Reversed Top Stitch all the way
Slip stitch it together, so it shapes a headband. Use the top bump of the current row (as you have till now) and use the bottom two loops from the foundation row. See the image.

Second Layer
To make everything stretchy, you need to attach the second layer on the fly. Meaning, you crochet a row at a time and immediately attach this row to the first layer.Take a look at the first layer and find the hole between the outermost two vertical bars on each side. This is where you should insert your hook, when you stitch the two pieces together.
Attachment
I like doing kind of a double attachment on both sides, as I think this made the prettiest edge. It doesn't add any extra functionality though.Alternatively you could do single crochet every time it says 'attach'. If you want that, then skip the attachment descriptions and head straight to the Second Layer Pattern.
Left Side Attachment
When you reach the left side of your work, you need to attach the row to the side of the first layer. Find a hole in a row in the first layer that looks suitable for attachment.
- Insert hook (from the front) into the hole of your choice.
- YO (yarn over) and pull through one loop (image)
- Insert hook into the same hole, but from behind (orange arrow)
- YO and pull through one loop
- YO and pull through 3 loops (including the last picked up loop at your forward motion)
- ...proceed with the back motion of your row. *YO, pull through 2 loops* all the way.

Before you attach here first time, make sure your single row is not twisted. Attach the first row like this:
- do a sc (single crochet) in the first suitable hole in the same row as you just attached to at the left side of your work. (orange arrow #1)
- Then do a sc crochet in the next suitable hole. (orange arrow #2) You will use this hole again, when you attach the next row. So there will be 2 sc in each hole.

- do a sc in the hole, where there is already a sc (red arrow #3).
- Then do a sc crochet in the next suitable hole (red arrow #4). You will use this hole again for the next row.
Second Layer Pattern
- Chain 20
- Top Stitch all the way. Attach, when you reach the left side of your work.
- When you reach the right side of your work, attach.
- Top Stitch all the way. Attach, when you reach the left side of your work.
- When you reach the right side of your work, attach.
- Reversed Top Stitch all the way. Attach, when you reach the left side of your work.
- When you reach the right side of your work, attach.
- Reversed Top Stitch all the way. Attach, when you reach the left side of your work.
- When you reach the right side of your work, attach.
When you reach the end, slip stitch the top and bottom together as you did with the first layer.
Cut the yarn and secure it.
Sew in ends. Make sure you do it along the ribs. If you do it across the ribs, you might prevent the headband from stretching.

Congratulations
Congratulations, your headband is ready! Mom is happy about hers, I hope you will be happy about yours too.

Btw
I didn't have this pattern tested by anyone but myself, so if you run into trouble, please let me know! I'ld love to help you out, and if there are any mistakes, they should be corrected. You can find me here or on Facebook.UPDATE: If you would like this pattern as a PDF file, it is now available at Ravelry and Love Crochet.
© COPYRIGHT and SELLING
Feel free to do as you please with all the products you make from this pattern. You can sell or donate finished products, if you like. This applies to all my patterns!
If you want to share the pattern with a friend, links back to here are very much appreciated. More blog visitors might make it possible for me to make more patterns for you.
My photos as well as the pattern itself are copyright protected though. Copying in any form is not allowed without my permission. (JFYI: I'm likely to let you reuse a photo, if you have a good reason for it).


0 comments
I’d love to hear your thoughts! ❤️
If I don’t reply to a question here, feel free to reach out via the contact page :)