Chain Mail Shirt
The back of the Tunisian Top Stitch has similarities to a chain mail when using a large hook.
It is perfect for halloween or for any everyday childrens play.

The project is fast and it doesn't matter, if you make a little mistake here and there. So feel free to try even if you just learned to do the Tunisian Top Stitch.
This is a detailed guide. Grab your yarn, measure tape, a shirt of approximately the right size and your creativity.
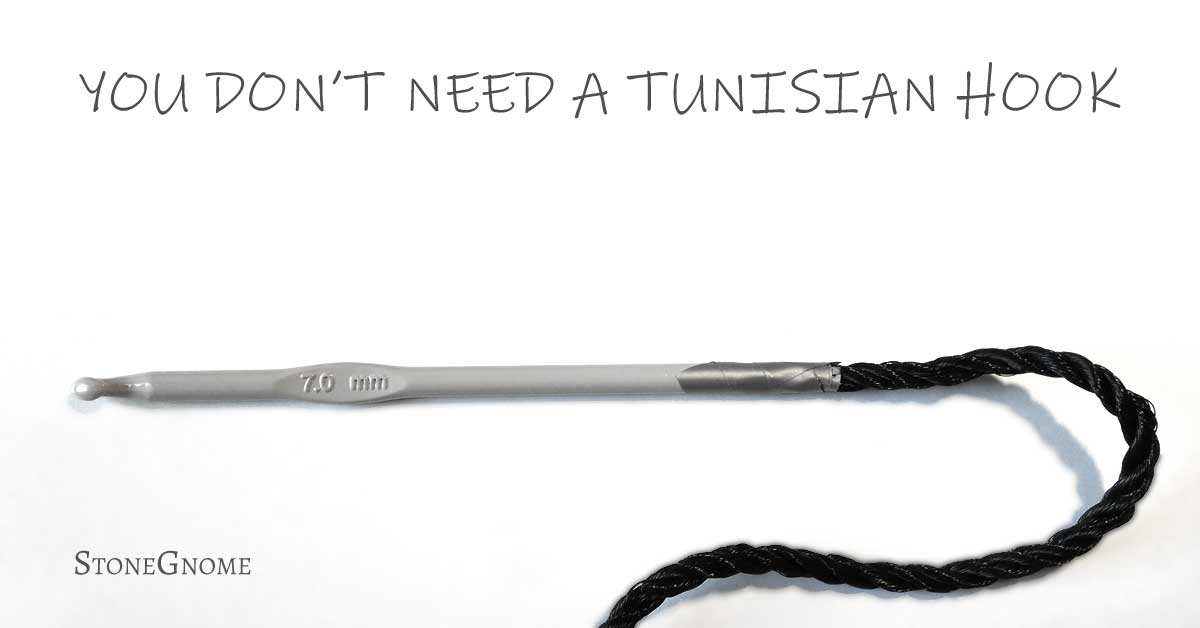
You need
- scissors - for your yarn only, do NOT cut the sample shirt you found!
- needle for sewing in ends.
- yarn: acrylic is fine.
- yarn weight: DK (133m/50g or 145.5yds/1.76oz)
- I used: Torino from Lane Cervinia - 120g (4.2oz) for a size 3-4 year old.
- at least one size 10mm straight hook with a rubber band around the far end.
- OR - if possible - a Tunisian hook with hooks on both ends (or make your own).
Step 1 - Draw and Measure
Get the measurements from the shirt you want to copy. If you want to adjust anything, do it now.The top stitch is very flexible, so the sizes on my drawing makes the costume large enough to be worn on top of a jacket as well as on top of a regular shirt.

Use Google to convert the cm into inches if you like and if you want the exact same size as I.
I took one of my 3-year olds shirts and added a little length to make room for a side seam slit.
I also changed the neck to an easier one with a slit making plenty of room for my kid's huge head.
And finally I decided to make the arms straight and not too long, as I think this goes well with a chain mail.
Notice: The top stitch likes to stretch. So when you measure the work laying flat down, it should be 10% shorter, as it stretches when worn (due to gravity). Does that 10% explanation make sense to you? If it is supposed to be 40cm (15.75in) long, then make it 36cm (14.2in) when laying flat on a table.
My measurements on the drawing are those I used, when the costumes was laying flat on a table.
AND REMEMBER: We want The BACK of the top stitch. So the side you look at, when you crochet, will be the WRONG side of the final shirt.
Step 2 - Crochet the Front and Back
You can start from the top or the beginning. The top stitch will look the same.I started the shirt from the bottom. I regretted that, as my boy suddenly came by and wanted it to be knee length - and then changed his mind back, when he saw the result. So I had to frog the neck. It would have been easier to frog the part with the side seams. - Or at least to do a reality check on the way down there :)

Continue working in a spiral to make the back and then front at the same time: When you have the two rectangles, you start picking up loops on one of them and when you reach the end of the first one, continue on the other piece.
See ChiCrochets video for Tunisian Crochet in the Round.
Ignore that she changes colors. It just makes it easier for you to see, what she does.

If you work in a spiral, then remember to stop, when you get to the sleeve openings (make plenty of room here). My work measured 24cm (9.5in)here - laying flat. From here I crocheted in rows. Back and forward. Back side first and then the front side.
Neck

5cm (2in) from the measurement target, mark the center of the work for the neck slit. Stop crocheting, when you get to the slit and worked your way back again doing one side first. When done, cut the yarn and do the second part afterwards. This leaves a 5 cm slit in the middle.
Slip Stitch Shoulders Together
Now, stitch the back and the front together on top of the shoulders. You can use a regular slip stitch for that. Remember: You want the WRONG side to be visible. So put the front and back side together, so the wrong sides face each other. That way your slip stitches will be on the back of the costume.Step 3 - The Arms
Remember that the top Stitch likes to stretch lengthwise? Currently there should plenty of room for the armpits. Make sure to pick up stitches anywhere possible, so there keep being plenty of space in the armpit.
If you work back and forward in rows, then make the arm as a huge rectangle. The seam should be placed under the arm and will be slip stitched together.
No decreases.
When both arms are done, cut the yarn and pull it through the last loop on the hook. Hide the closing off, when you sew in ends. This shirt is for dressing up, not an everyday garment, so it doesn't matter if it looks a little rough.
Step 4 - Assembly
If you didn't work in a spiral, then you can crochet pieces together now with loose slip stitches. Remember that the BACK side of your work is the one we want to show, so put things together while you watch the front side of your work.Weave in Ends

Tadaa ! Chain Mail done!

Optional - Making Highlights

Put paint on a big brush and wipe the brush off, so there isn't too much paint. Don't put pressure on the brush while painting. Paint in the direction of top to bottom only. Highlights are supposed to look like sunlight and they only come from one direction.
You should rather add a little paint at a time and then do the maneuver several times, than give it too much from the beginning.
Put it on a hanger and let it dry.


0 comments
I love to hear your thoughts :)
I do my best to answer questions, but every once in a while a notification doesn’t reach me, so if you are in a hurry, try the contact page or write to me from Facebook or Instagram <3